Public transit ticket (Aztec) — 80×50 mm
Public transit ticket (train/bus/metro): type, zone, validity, fare, issue time, ID and Aztec validation barcode.
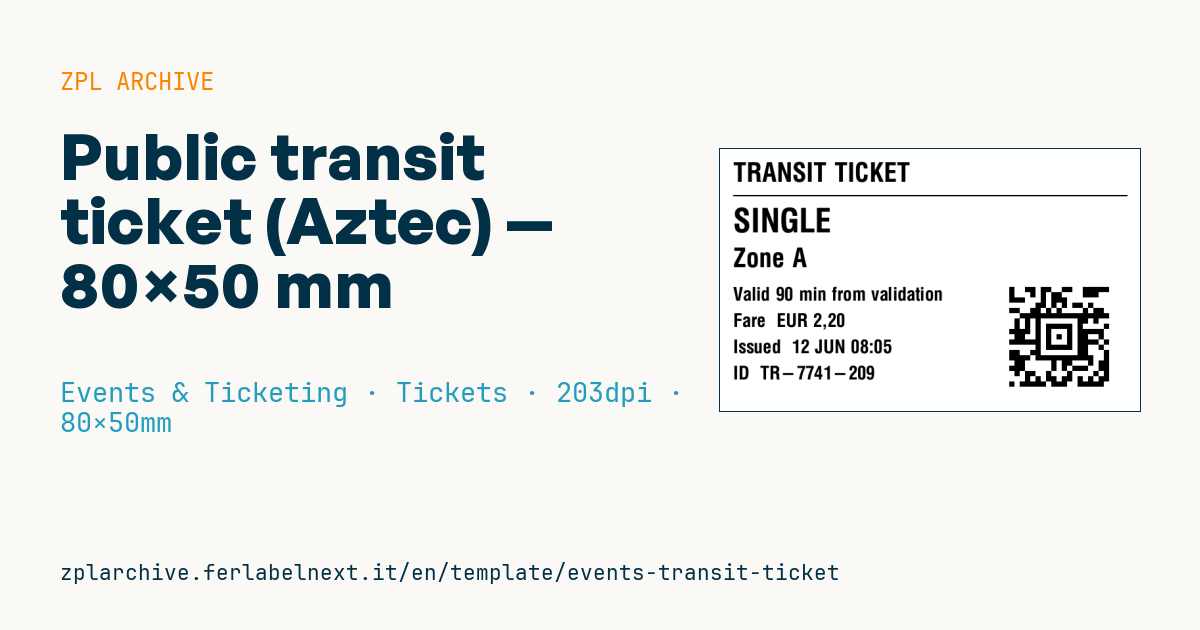
Public transit ticket
80×50 mm @ 203 dpi. For train/bus/metro. The Aztec is the most common symbology in transit ticketing (compact, robust at low contrast) and carries the validation payload at the gate.
Placeholders
ticket_type— type (e.g. SINGLE, RETURN, DAY PASS)zone— fare zonevalidity— validity (e.g. 90 min)fare— fareissued— issue date/timeticket_id— identifieraztec_payload— validation data in the Aztec
When to use it
Transport operators, fare associations and event shuttle operators use it: it is printed at ticket vending machines, on board by staff with mobile printers, or at the ticket office. The passenger shows it at the station gate, the on-board validator or to the inspector, who scans the Aztec with a handheld and checks type, zone and validity window.
The media is usually direct thermal ticket card or paper on rolls. The ticket lasts from a few minutes to a day, but lives in pockets and wallets and may pass through several validators: the code must stay readable even when the ticket is folded.
Standards and requirements
The Aztec symbology is defined by ISO/IEC 24778. The payload content, digital signature and validation rules are set by the operator or fare system: rail has its own sector specifications, but the format you need is in your operator's documentation. The template prints the payload exactly as you supply it.
In ZPL, Aztec is printed with ^B0, where you set magnification and error correction level. If the payload contains binary bytes or is signed, send it as hex with ^FH and do not apply encoding conversions such as ^CI28, which can alter bytes and break the signature.
Common mistakes
- Printing the issue time from an unsynchronised printer clock: time-based validity ends up wrong.
- Changing spaces or characters in the payload to fit the layout, breaking code verification.
- Shrinking the Aztec below what on-board validators can read, which is often stricter than handhelds.
- Leaving rolls in a vehicle parked in the sun: thermal paper turns dark.
FAQ
Why do transit tickets use Aztec codes?
Aztec holds a lot of data in little space, has a central finder pattern that makes it easy to locate and does not need a large quiet zone around the symbol.
Can an Aztec ticket be printed on plain paper?
Technically yes, but the operator decides whether to accept it. Vending machines use thermal paper because it is fast, cheap and needs no ribbon.
ZPL code
^XA
^LL400
^CI28
^PW640
^CF0,40^FO20,20^FDTRANSIT TICKET^FS
^FO20,70^GB600,2,2^FS
^CF0,50^FO20,90^FD{{ticket_type}}^FS
^CF0,40^FO20,150^FDZone {{zone}}^FS
^CF0,28^FO20,210^FDValid {{validity}}^FS
^FO20,250^FDFare  {{fare}}^FS
^FO20,290^FDIssued  {{issued}}^FS
^FO20,330^FDID  {{ticket_id}}^FS
^FO440,210^BON,8,N,0,N^FD{{aztec_payload}}^FS
^XZ- Industry: Events & Ticketing
- Category: Tickets
- DPI: 203
- Size: 80×50 mm
- Tags: Access control, Aztec, Ticket, Ticketing
What this label contains
Barcodes
- Aztec
- 2D code that needs no quiet zone: tickets, transport and access passes.
Elements
- 7 text fields
- 7 variable fields to fill in
- boxes and separator lines
Variable fields
| Field | Description | Example |
|---|---|---|
ticket_type | Type | SINGLE |
zone | Zone | A |
validity | Validity | 90 min from validation |
fare | Fare | EUR 2,20 |
issued | Issued | 12 JUN 08:05 |
ticket_id | ID | TR-7741-209 |
aztec_payload | Aztec payload | TRA|ZA|S|7741209 |
Format and printing
80×50 mm (3.15×1.97″) at 203 dpi: 639×400 dots. Landscape.
Compatible Zebra printers
You need a printer with a 4″ printhead at 203 dpi, for example:
- Zebra ZD421 (desktop)
- Zebra ZD621 (desktop)
- Zebra GK420 (desktop)
- Zebra ZT231 (industrial)
- Zebra ZT411 (industrial)
- Zebra ZT610 (industrial)
- Zebra ZQ521 (mobile)
- Zebra ZQ630 (mobile)
Any Zebra printer with a wider printhead and the same resolution works too.
The code is written for 203 dpi: on a printer with a different resolution the label prints larger or smaller and needs rescaling.
How to use it
- Open “Customize placeholders” and enter your data in the variable fields listed above.
- Check the preview: it is rendered from the same ZPL code you will send to the printer.
- Download the .zpl file or copy the code and send it to the printer: with “Print” through Zebra Browser Print, or as a raw file to port 9100 if the printer is on the network.
- Load 80×50 mm labels and make sure the printer is set to 203 dpi. For a different size use “Duplicate & edit” and adapt the layout in the builder.
Edit it in the editor
To change the layout, use “Duplicate & edit”: the template opens in the online ZPL editor, where you modify it and save it to your account for free.
Related templates
- Press pass — 100×70 mm 203 dpi · Events & Ticketing · Accreditation & access
- Event admission ticket — 100×50 mm 203 dpi · Events & Ticketing · Tickets
- Boarding pass (PDF417) — 100×60 mm 203 dpi · Events & Ticketing · Tickets
- Concert seated ticket — 100×60 mm 203 dpi · Events & Ticketing · Seating & cloakroom
- Retail gift card with logo — 65×40 mm 300 dpi · Events & Ticketing · Vouchers & tokens
- Gift voucher — 85×54 mm CR80 300 dpi · Events & Ticketing · Vouchers & tokens
- Cashless festival wristband — 250×25 mm 203 dpi · Events & Ticketing · Accreditation & access
- Drink token — 40×40 mm 203 dpi · Events & Ticketing · Vouchers & tokens