Instrument calibration tag (QR) — 40×30 mm
High-resolution calibration tag (600 dpi): instrument, calibration and due date, lab, reference standard and QR.
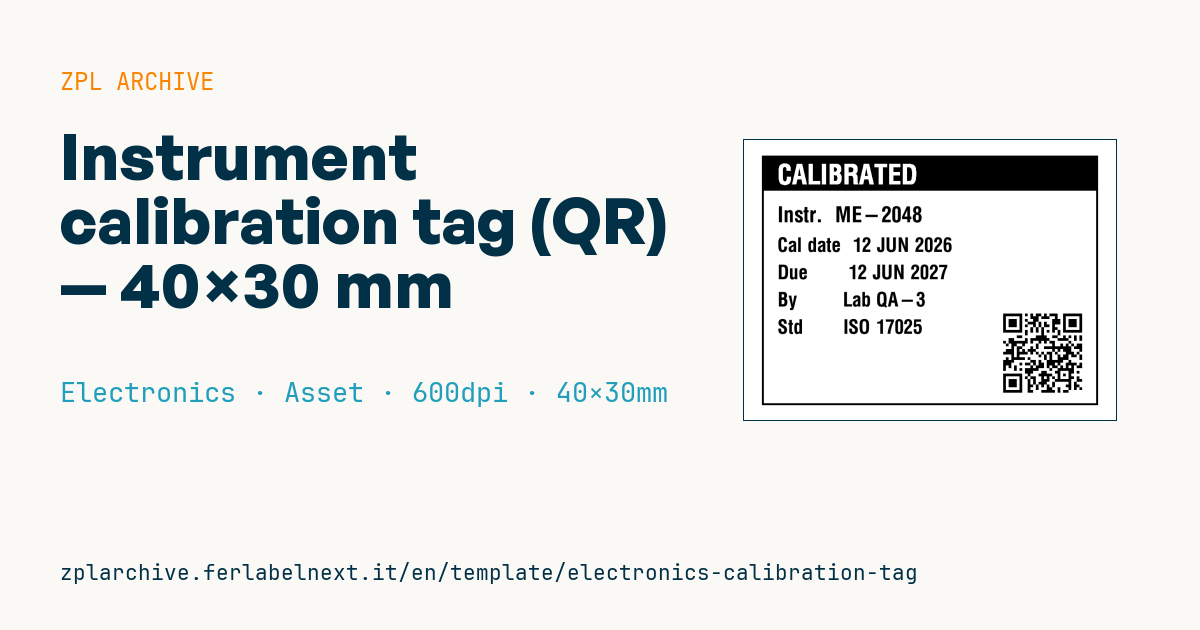
Instrument calibration tag
40×30 mm @ 600 dpi (high resolution, for small labels on measuring instruments). Reverse band "CALIBRATED" + calibration data and verification QR.
Placeholders
instrument— instrument IDcal_date— calibration datedue_date— next calibrationcalibrated_by— lab/bodystandard— reference standard (e.g. ISO 17025)qr_payload— verification data in the QR
When to use it
In-house metrology labs and calibration service providers apply it to callipers, multimeters, pressure gauges, torque wrenches and bench instruments after each service. Operators on the shop floor need to see at a glance whether the instrument is in valid status, and an auditor must be able to reach the certificate by scanning the QR.
Instruments are handled daily and cleaned with alcohol or detergents: use polyester or polyimide with a resin ribbon, often in a tamper-evident version (void or destructible) to show removal. Direct thermal paper fades before the calibration due date and should be avoided.
Standards and requirements
ISO 9001 (clause 7.1.5) requires measuring equipment to be identified so that its calibration status can be determined, with traceability to national or international standards; IATF 16949 adds automotive requirements. ISO/IEC 17025 covers the competence of the laboratory performing the calibration, not the instrument itself: keep that in mind when filling in the standard field.
At 600 dpi one dot is about 0.042 mm: with ^BQN,2,m pick a magnification that gives modules a smartphone can read, and for a QR on surfaces that get dirty use error correction Q or H in the ^FD field.
Common mistakes
- Writing dates in an ambiguous format (03/04): use YYYY-MM-DD.
- Printing "CALIBRATED" on an instrument found out of tolerance or released with restrictions.
- Encoding a link to an internal folder the auditor cannot reach.
- Sending the file to a 203 or 300 dpi printer: the coordinates are designed for 600 dpi.
FAQ
What should the QR on a calibration label contain?
The instrument ID or the certificate number, or a stable URL to the certificate in your management system. Short data keeps the code small and robust.
Is a calibration due date mandatory?
The interval is set by your organisation or customer, not by a single standard. Showing the next due date is the most common practice because it makes the status visible.
ZPL code
^XA
^LL709
^CI28
^PW944
^FO40,40^GB864,640,5^FS
^FO40,40^GB864,90,90^FS
^FR^CF0,70^FO80,62^FDCALIBRATED^FS
^CF0,55^FO80,170^FDInstr.  {{instrument}}^FS
^CF0,50^FO80,250^FDCal date  {{cal_date}}^FS
^FO80,320^FDDue       {{due_date}}^FS
^FO80,390^FDBy        {{calibrated_by}}^FS
^FO80,460^FDStd       {{standard}}^FS
^FO660,435^BQN,2,7^FDQA,{{qr_payload}}^FS
^XZ- Industry: Electronics
- Category: Asset
- DPI: 600
- Size: 40×30 mm
- Tags: Asset tag, Calibration, Compliance 2024, Electronics, QR Code
What this label contains
Barcodes
- QR Code
- 2D code for links, text and structured data, readable by any smartphone.
Elements
- 6 text fields
- 6 variable fields to fill in
- boxes and separator lines
Variable fields
| Field | Description | Example |
|---|---|---|
instrument | Instrument | ME-2048 |
cal_date | Cal date | 12 JUN 2026 |
due_date | Due date | 12 JUN 2027 |
calibrated_by | Calibrated by | Lab QA-3 |
standard | Standard | ISO 17025 |
qr_payload | QR payload | CAL|ME-2048|2027-06-12 |
Format and printing
40×30 mm (1.57×1.18″) at 600 dpi: 945×709 dots. Landscape.
The code is written for 600 dpi: on a printer with a different resolution the label prints larger or smaller and needs rescaling.
How to use it
- Open “Customize placeholders” and enter your data in the variable fields listed above.
- Check the preview: it is rendered from the same ZPL code you will send to the printer.
- Download the .zpl file or copy the code and send it to the printer: with “Print” through Zebra Browser Print, or as a raw file to port 9100 if the printer is on the network.
- Load 40×30 mm labels and make sure the printer is set to 600 dpi. For a different size use “Duplicate & edit” and adapt the layout in the builder.
Edit it in the editor
To change the layout, use “Duplicate & edit”: the template opens in the online ZPL editor, where you modify it and save it to your account for free.
Related templates
- ESD / voltage warning label — 50×30 mm 203 dpi · Electronics · Commercial label
- Cable/connector label (flag wrap) — 50×25 mm 300 dpi · Electronics · Commercial label
- Battery rating label — 50×30 mm 203 dpi · Electronics · Commercial label
- DataMatrix PCB label — 25×25 mm 300 dpi · Electronics · Traceability
- RMA return tag — 70×50 mm 203 dpi · Electronics · Return
- Device manual/support QR — 40×40 mm 300 dpi · Electronics · Commercial label
- Warranty label — 60×40 mm 203 dpi · Electronics · Commercial label
- IT asset tag with QR — 50×25 mm 300 dpi · Electronics · Asset