Warranty label — 60×40 mm
Warranty label for electronic products: product, serial number, purchase date, warranty duration and legal note. To apply on the device or its packaging.
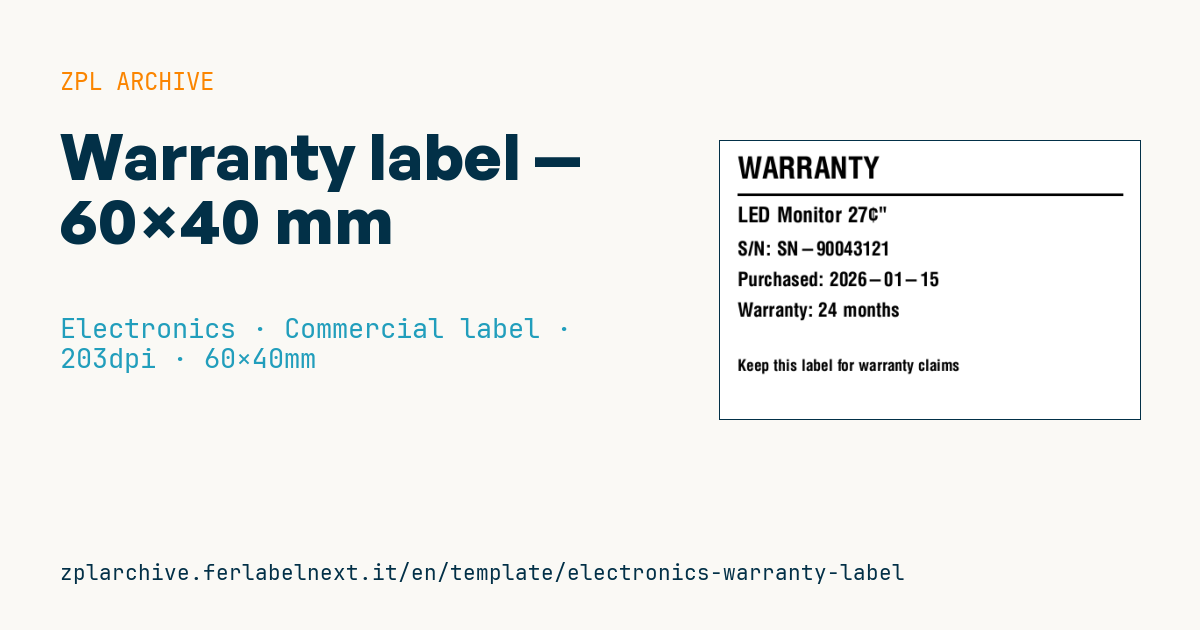
Warranty label
60×40 mm @ 203 dpi. Title, separator line, then product, serial, purchase date, warranty duration and a footer note.
Placeholders
title_label— heading (e.g.WARRANTY)product_name— product nameserial— serial numberpurchase_label/purchase_date— purchase label and datewarranty_label/warranty_period— label and durationfooter_note— legal note
When to use it
Manufacturers, retailers and service centres apply it to the device or its packaging at sale or delivery, so the customer and the technician can immediately find serial number, purchase date and coverage period. It is most useful for products sold with an additional commercial warranty, or for equipment installed at the customer's site, where receipts are easily lost.
On the device use polyester in thermal transfer, often tamper-evident; on the box or on a certificate the customer keeps, coated paper is enough. Direct thermal fades within a few years, before the coverage ends.
Standards and requirements
In the EU, Directive (EU) 2019/771 gives consumer goods a legal guarantee of conformity of at least two years, owed by the seller; some countries go further, such as Spain with three years. The manufacturer's commercial warranty comes on top and does not reduce the legal guarantee: if you print a duration, make clear which of the two it refers to. For the mandatory content of a commercial warranty, check the law of the country of sale.
In ZPL, if the legal note contains accents or symbols use ^CI28 and check the chosen font supports them; for long text ^FB handles line wrapping.
Common mistakes
- Printing "1-year warranty" on a consumer product, suggesting the legal guarantee is shorter.
- Writing the purchase date in a format a customer in another country reads the wrong way round.
- Printing the label at the factory with a date that actually depends on the sale.
- Using a poorly translated legal note, or one valid for only one market.
FAQ
What is the difference between legal guarantee and commercial warranty?
The legal guarantee is set by law and owed by the seller; a commercial warranty is a voluntary commitment by the manufacturer or seller, with its own terms.
Do I need the warranty label to make a claim?
Usually proof of purchase is enough. The label helps identify the product and date, but it does not replace the receipt or invoice.
ZPL code
^XA
^PW480
^LL320
^CI28
^CF0,34^FO20,18^FD{{title_label}}^FS
^FO20,60^GB440,3,3^FS
^CF0,24^FO20,75^FD{{product_name}}^FS
^CF0,22^FO20,115^FDS/N: {{serial}}^FS
^CF0,22^FO20,150^FD{{purchase_label}}: {{purchase_date}}^FS
^CF0,22^FO20,185^FD{{warranty_label}}: {{warranty_period}}^FS
^CF0,18^FO20,250^FD{{footer_note}}^FS
^XZ- Industry: Electronics
- Category: Commercial label
- DPI: 203
- Size: 60×40 mm
- Tags: Brand warranty, Compliance 2024, Electronics, Warranty
What this label contains
Barcodes
This label contains no barcodes: it is made of text and graphics.
Elements
- 6 text fields
- 8 variable fields to fill in
- boxes and separator lines
Variable fields
| Field | Description | Example |
|---|---|---|
title_label | Heading | WARRANTY |
product_name | Product | LED Monitor 27\" |
serial | Serial | SN-90043121 |
purchase_label | Purchased | Purchased |
purchase_date | Purchase date | 2026-01-15 |
warranty_label | Warranty | Warranty |
warranty_period | Period | 24 months |
footer_note | Note | Keep this label for warranty claims |
Format and printing
60×40 mm (2.36×1.57″) at 203 dpi: 480×320 dots. Landscape.
Compatible Zebra printers
You need a printer with a 4″ printhead at 203 dpi, for example:
- Zebra ZD421 (desktop)
- Zebra ZD621 (desktop)
- Zebra GK420 (desktop)
- Zebra ZT231 (industrial)
- Zebra ZT411 (industrial)
- Zebra ZT610 (industrial)
- Zebra ZQ521 (mobile)
- Zebra ZQ630 (mobile)
Any Zebra printer with a wider printhead and the same resolution works too.
The code is written for 203 dpi: on a printer with a different resolution the label prints larger or smaller and needs rescaling.
How to use it
- Open “Customize placeholders” and enter your data in the variable fields listed above.
- Check the preview: it is rendered from the same ZPL code you will send to the printer.
- Download the .zpl file or copy the code and send it to the printer: with “Print” through Zebra Browser Print, or as a raw file to port 9100 if the printer is on the network.
- Load 60×40 mm labels and make sure the printer is set to 203 dpi. For a different size use “Duplicate & edit” and adapt the layout in the builder.
Edit it in the editor
To change the layout, use “Duplicate & edit”: the template opens in the online ZPL editor, where you modify it and save it to your account for free.
Related templates
- Instrument calibration tag (QR) — 40×30 mm 600 dpi · Electronics · Asset
- Cable/connector label (flag wrap) — 50×25 mm 300 dpi · Electronics · Commercial label
- ESD / voltage warning label — 50×30 mm 203 dpi · Electronics · Commercial label
- Battery rating label — 50×30 mm 203 dpi · Electronics · Commercial label
- DataMatrix PCB label — 25×25 mm 300 dpi · Electronics · Traceability
- RMA return tag — 70×50 mm 203 dpi · Electronics · Return
- Device manual/support QR — 40×40 mm 300 dpi · Electronics · Commercial label
- IT asset tag with QR — 50×25 mm 300 dpi · Electronics · Asset