ESD / voltage warning label — 50×30 mm
Warning label for electrostatic-discharge-sensitive (ESD) components: reverse band, warnings, voltage and ESD class.
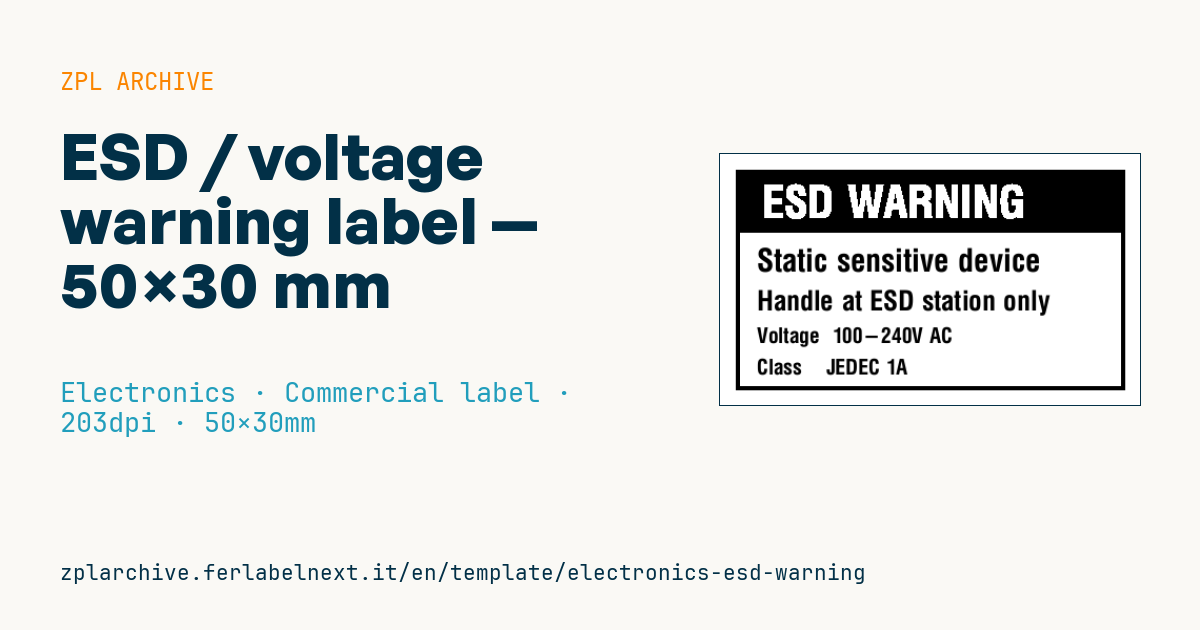
ESD / voltage warning label
50×30 mm @ 203 dpi. Warning for electrostatic-discharge-sensitive (ESD) components: reverse header band + handling warnings, voltage and sensitivity class. No hand-drawn icons (the user adds them with their image→ZPL system).
Placeholders
line1,line2— warning linesvoltage— operating voltageesd_class— ESD sensitivity class
When to use it
It goes on shielding bags, conductive boxes, trays and containers carrying components or boards sensitive to electrostatic discharge, and sometimes on benches or cabinets in the protected area (EPA). It warns whoever receives or handles the package to open it only in a protected area, wearing a grounded wrist strap.
Watch the material: an ordinary label unwound and peeled off its liner can build up static charge. For use inside the EPA there are low-charging or dissipative label stocks; ask your supplier for surface resistance data.
Standards and requirements
ESD control programmes are based on IEC 61340-5-1 and, in North America, ANSI/ESD S20.20; ESD warning symbols are described in ANSI/ESD S8.1. A component's sensitivity class comes from HBM (ANSI/ESDA/JEDEC JS-001) or CDM (JS-002) testing reported in the datasheet: it must not be guessed.
The template does not include the graphic symbol: if you add it as an image with ^GF, check that it stays sharp at 203 dpi. For the reverse band, ^FR on the text over a filled ^GB saves redrawing the background.
Common mistakes
- Confusing the device's operating voltage with its ESD damage threshold: they are two different figures.
- Stating an invented or generic ESD class with no reference to the datasheet.
- Labelling only the outer carton and not the inner bag, which is the one opened at the bench.
- Treating the warning label as if it made non-protective packaging safe.
FAQ
What does ESD class 1A or 2 mean?
They are sensitivity classes under the HBM model: the lower the class, the lower the voltage that can damage the part. The exact value is in the datasheet.
Is the ESD symbol legally required?
It is usually required by your company's ESD programme or by the customer rather than by law. Check your customer's contractual requirements.
ZPL code
^XA
^LL240
^CI28
^PW400
^FO15,15^GB370,210,4^FS
^FO15,15^GB370,60,60^FS
^FR^CF0,42^FO40,30^FDESD WARNING^FS
^CF0,30^FO35,90^FD{{line1}}^FS
^CF0,26^FO35,130^FD{{line2}}^FS
^CF0,20^FO35,165^FDVoltage  {{voltage}}^FS
^CF0,20^FO35,195^FDClass    {{esd_class}}^FS
^XZ- Industry: Electronics
- Category: Commercial label
- DPI: 203
- Size: 50×30 mm
- Tags: Electronics, Safety, Specifications
What this label contains
Barcodes
This label contains no barcodes: it is made of text and graphics.
Elements
- 5 text fields
- 4 variable fields to fill in
- boxes and separator lines
Variable fields
| Field | Description | Example |
|---|---|---|
line1 | Line 1 | Static sensitive device |
line2 | Line 2 | Handle at ESD station only |
voltage | Voltage | 100-240V AC |
esd_class | Class | JEDEC 1A |
Format and printing
50×30 mm (1.97×1.18″) at 203 dpi: 400×240 dots. Landscape.
Compatible Zebra printers
You need a printer with a 2″ printhead at 203 dpi, for example:
- Zebra ZD411 (desktop)
- Zebra ZD611 (desktop)
- Zebra ZQ220 (mobile)
- Zebra ZQ310 (mobile)
Any Zebra printer with a wider printhead and the same resolution works too.
The code is written for 203 dpi: on a printer with a different resolution the label prints larger or smaller and needs rescaling.
How to use it
- Open “Customize placeholders” and enter your data in the variable fields listed above.
- Check the preview: it is rendered from the same ZPL code you will send to the printer.
- Download the .zpl file or copy the code and send it to the printer: with “Print” through Zebra Browser Print, or as a raw file to port 9100 if the printer is on the network.
- Load 50×30 mm labels and make sure the printer is set to 203 dpi. For a different size use “Duplicate & edit” and adapt the layout in the builder.
Edit it in the editor
To change the layout, use “Duplicate & edit”: the template opens in the online ZPL editor, where you modify it and save it to your account for free.
Related templates
- Instrument calibration tag (QR) — 40×30 mm 600 dpi · Electronics · Asset
- Cable/connector label (flag wrap) — 50×25 mm 300 dpi · Electronics · Commercial label
- Battery rating label — 50×30 mm 203 dpi · Electronics · Commercial label
- DataMatrix PCB label — 25×25 mm 300 dpi · Electronics · Traceability
- RMA return tag — 70×50 mm 203 dpi · Electronics · Return
- Device manual/support QR — 40×40 mm 300 dpi · Electronics · Commercial label
- Warranty label — 60×40 mm 203 dpi · Electronics · Commercial label
- IT asset tag with QR — 50×25 mm 300 dpi · Electronics · Asset