Calibration due label — 50×30 mm
Calibration label for measuring instruments: instrument ID, calibration date, next due date and technician. For metrological compliance (ISO).
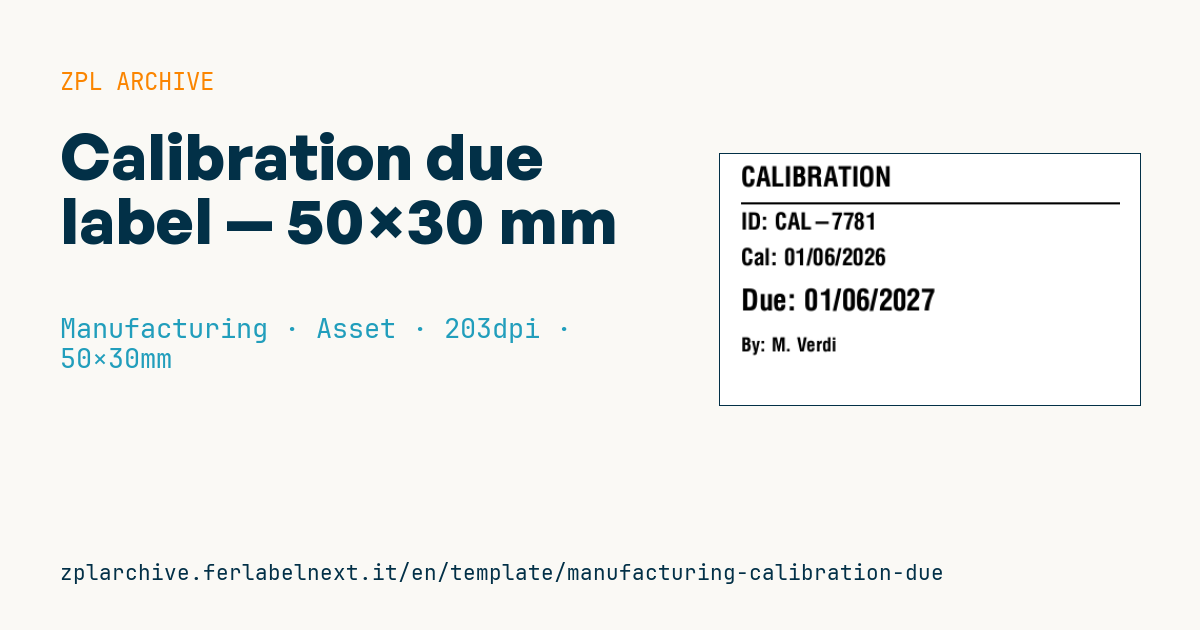
Calibration due label
50×30 mm @ 203 dpi. Title, separator, instrument ID, calibration date, prominent due date and technician.
Placeholders
title_label— title (e.g.CALIBRATION)instrument_id— instrument IDcal_date/due_date— calibration and due datetechnician— technician
When to use it
The in-house metrology lab, the quality department or an external calibration provider applies it to callipers, micrometers, torque wrenches, pressure gauges and scales after each calibration. The operator on the shop floor must see at once whether the instrument can be used: the prominent due date is there for that, and during an audit it lets you check status without opening the software. The instrument is handled every day and often meets oils and cleaners: use polyester with resin thermal transfer, ideally with a clear overlaminate.
Standards and requirements
ISO 9001:2015 (clause 7.1.5) requires equipment used to verify conformity to be calibrated or verified, traceable to national or international standards, and identified so its status can be determined. Similar requirements appear in IATF 16949 for automotive, while ISO 10012 covers measurement management systems and ISO/IEC 17025 applies to calibration laboratories. None of them prescribes a label format: what counts is a unique ID, date, due date and who performed the calibration. At 50×30 mm pick a legible font and write dates as YYYY-MM-DD (ISO 8601) to avoid ambiguity.
Common mistakes
- Keeping an overdue instrument in use because the label has faded or is covered in dirt.
- Using mixed date formats (
03/04may mean March or April) in companies with foreign suppliers. - Sticking the label on a surface that heats up or flexes, such as a wrench grip.
- Not using a distinct label for instruments that are out of service or limited use.
FAQ
How often should an instrument be calibrated?
You decide based on use, criticality, history and the manufacturer's guidance; the standard requires the interval to be defined and followed.
Is a calibration label mandatory?
ISO 9001 requires status to be identifiable; a label is the usual way, but a code linked to a register can also be enough.
Can I add a barcode?
Yes: a Code 128 or DataMatrix with the instrument ID speeds up audits and check-out from the gauge crib.
ZPL code
^XA
^PW400
^LL240
^CI28
^CF0,26^FO20,12^FD{{title_label}}^FS
^FO20,46^GB360,2,2^FS
^CF0,22^FO20,56^FDID: {{instrument_id}}^FS
^CF0,22^FO20,90^FDCal: {{cal_date}}^FS
^CF0,28^FO20,128^FDDue: {{due_date}}^FS
^CF0,18^FO20,175^FDBy: {{technician}}^FS
^XZ- Industry: Manufacturing
- Category: Asset
- DPI: 203
- Size: 50×30 mm
- Tags: Calibration, Compliance 2024, Maintenance, Manufacturing
What this label contains
Barcodes
This label contains no barcodes: it is made of text and graphics.
Elements
- 5 text fields
- 5 variable fields to fill in
- boxes and separator lines
Variable fields
| Field | Description | Example |
|---|---|---|
title_label | Title | CALIBRATION |
instrument_id | Instrument ID | CAL-7781 |
cal_date | Cal date | 01/06/2026 |
due_date | Due | 01/06/2027 |
technician | Technician | M. Verdi |
Format and printing
50×30 mm (1.97×1.18″) at 203 dpi: 400×240 dots. Landscape.
Compatible Zebra printers
You need a printer with a 2″ printhead at 203 dpi, for example:
- Zebra ZD411 (desktop)
- Zebra ZD611 (desktop)
- Zebra ZQ220 (mobile)
- Zebra ZQ310 (mobile)
Any Zebra printer with a wider printhead and the same resolution works too.
The code is written for 203 dpi: on a printer with a different resolution the label prints larger or smaller and needs rescaling.
How to use it
- Open “Customize placeholders” and enter your data in the variable fields listed above.
- Check the preview: it is rendered from the same ZPL code you will send to the printer.
- Download the .zpl file or copy the code and send it to the printer: with “Print” through Zebra Browser Print, or as a raw file to port 9100 if the printer is on the network.
- Load 50×30 mm labels and make sure the printer is set to 203 dpi. For a different size use “Duplicate & edit” and adapt the layout in the builder.
Edit it in the editor
To change the layout, use “Duplicate & edit”: the template opens in the online ZPL editor, where you modify it and save it to your account for free.
Related templates
- Company asset tag with QR — 50×50 mm 203 dpi · Manufacturing · Asset
- Generic GS1-128 — 100×50 mm 203 dpi · Manufacturing · GS1-128
- Document control label — 60×40 mm 203 dpi · Manufacturing · Documents
- Kanban card — 100×70 mm 203 dpi · Manufacturing · Commercial label
- Fixed asset with QR — 50×30 mm 203 dpi · Manufacturing · Asset
- Preventive maintenance — 60×40 mm 203 dpi · Manufacturing · Asset
- Daily visitor pass — 100×70 mm 203 dpi · Manufacturing · Badge
- Machine asset DataMatrix — 40×25 mm 300 dpi · Manufacturing · Asset