Fixed asset with QR — 50×30 mm
Fixed asset inventory label: type, ID, owner department, purchase date, warranty end, QR to record.
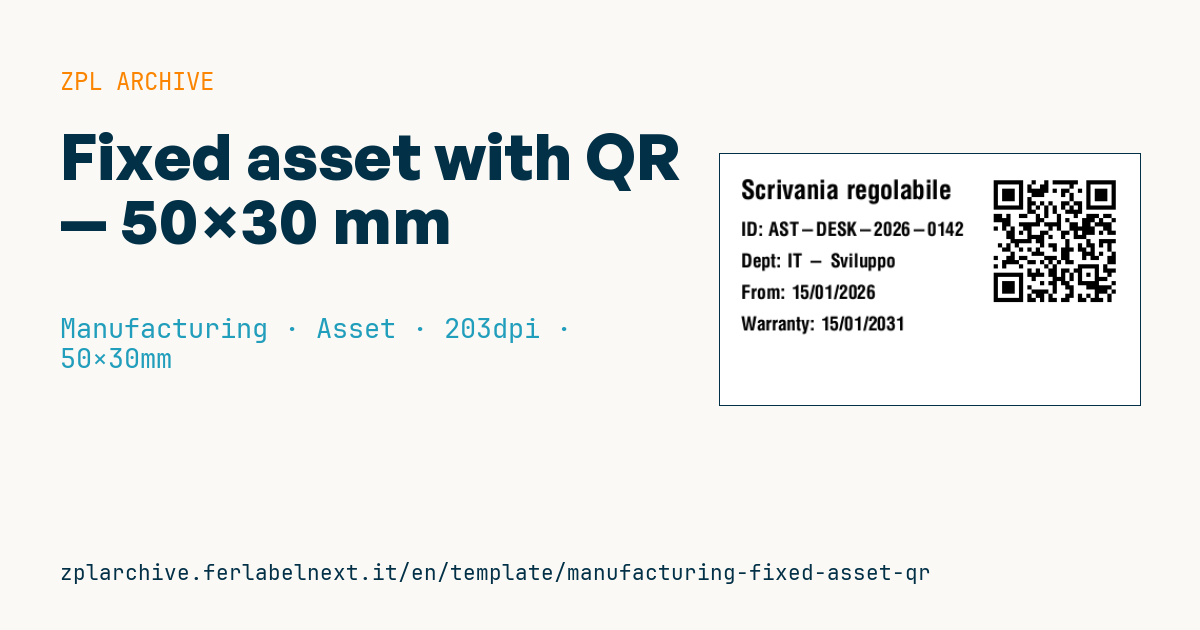
Fixed asset with QR
50×30 mm @ 203 dpi. Standard for company fixed assets inventory (furniture, non-IT equipment). QR links to the asset register record.
Placeholders
-
asset_type— e.g.Desk,Printer -
asset_id— unique asset id -
owner_dept— owning department -
purchase_date—dd/mm/yyyy -
warranty_end—dd/mm/yyyy -
asset_url— asset record URL
When to use it
Finance and purchasing use it to link physical items to the fixed asset register: desks, cabinets, non-IT machinery, trolleys, meeting room furniture. During a physical count, whoever walks the rooms scans the QR and confirms the item is where it should be, flagging missing items or ones due for disposal. Printed purchase and warranty end dates also help maintenance and purchasing without opening the software. The label stays on wood, metal or plastic for years: polyester with thermal transfer, plus tamper-evident stock if you want removal to be obvious.
Standards and requirements
There is no standard for the label itself: the reference is the accounting rules for fixed assets, such as IAS 16 for property, plant and equipment, or national GAAP, which require you to know which assets exist and their value. ISO 55000 provides the framework for asset management. The QR must comply with ISO/IEC 18004. At 50×30 mm and 300 dpi space is tight: keep the URL short and use ^BQN,2,3 or ^BQN,2,4 (modules of about 0.25-0.34 mm), testing with the devices you will actually use.
Common mistakes
- Reusing a disposed asset's ID: the accounting register and physical register stop matching.
- Not updating
owner_deptwhen the item moves department, leaving false information on the label. - Placing the label where the counting team cannot find it, or on surfaces cleaned with solvents.
- Tagging items below the capitalisation threshold, creating useless register lines.
FAQ
What is the difference between a fixed asset and an IT asset?
A fixed asset is recorded in the accounts and depreciated; an IT asset may or may not be, but it is also managed for configuration and assignment.
How often should fixed assets be physically counted?
It depends on company policy and your auditors; with QR labels you can count department by department through the year.
Do the printed dates need updating?
The purchase date does not; if the warranty is extended, reprint the label or rely on the online record only.
ZPL code
^XA
^PW400
^LL240
^CI28
^CF0,25^FO20,25^FD{{asset_type}}^FS
^CF0,18
^FO20,65^FDID: {{asset_id}}^FS
^FO20,95^FDDept: {{owner_dept}}^FS
^FO20,125^FDFrom: {{purchase_date}}^FS
^FO20,155^FDWarranty: {{warranty_end}}^FS
^FO260,15^BQN,2,4
^FDLA,{{asset_url}}^FS
^XZ- Industry: Manufacturing
- Category: Asset
- DPI: 203
- Size: 50×30 mm
- Tags: QR Code, Serial number
What this label contains
Barcodes
- QR Code
- 2D code for links, text and structured data, readable by any smartphone.
Elements
- 5 text fields
- 6 variable fields to fill in
Variable fields
| Field | Description | Example |
|---|---|---|
asset_type | Type | Scrivania regolabile |
asset_id | Asset id | AST-DESK-2026-0142 |
owner_dept | Department | IT - Sviluppo |
purchase_date | Purchase | 15/01/2026 |
warranty_end | Warranty end | 15/01/2031 |
asset_url | URL | https://gest.company.local/assets/AST-DESK-2026-0142 |
Format and printing
50×30 mm (1.97×1.18″) at 203 dpi: 400×240 dots. Landscape.
Compatible Zebra printers
You need a printer with a 2″ printhead at 203 dpi, for example:
- Zebra ZD411 (desktop)
- Zebra ZD611 (desktop)
- Zebra ZQ220 (mobile)
- Zebra ZQ310 (mobile)
Any Zebra printer with a wider printhead and the same resolution works too.
The code is written for 203 dpi: on a printer with a different resolution the label prints larger or smaller and needs rescaling.
How to use it
- Open “Customize placeholders” and enter your data in the variable fields listed above.
- Check the preview: it is rendered from the same ZPL code you will send to the printer.
- Download the .zpl file or copy the code and send it to the printer: with “Print” through Zebra Browser Print, or as a raw file to port 9100 if the printer is on the network.
- Load 50×30 mm labels and make sure the printer is set to 203 dpi. For a different size use “Duplicate & edit” and adapt the layout in the builder.
Edit it in the editor
To change the layout, use “Duplicate & edit”: the template opens in the online ZPL editor, where you modify it and save it to your account for free.
Related templates
- Company asset tag with QR — 50×50 mm 203 dpi · Manufacturing · Asset
- Generic GS1-128 — 100×50 mm 203 dpi · Manufacturing · GS1-128
- Kanban card — 100×70 mm 203 dpi · Manufacturing · Commercial label
- Document control label — 60×40 mm 203 dpi · Manufacturing · Documents
- Preventive maintenance — 60×40 mm 203 dpi · Manufacturing · Asset
- Daily visitor pass — 100×70 mm 203 dpi · Manufacturing · Badge
- Machine asset DataMatrix — 40×25 mm 300 dpi · Manufacturing · Asset
- IT asset (laptop/server) — 50×25 mm 300 dpi · Manufacturing · Asset