Employee badge with photo — 54×86 mm
Employee ID badge in CR80 standard card format: name, role, department, photo placeholder, validity and QR.
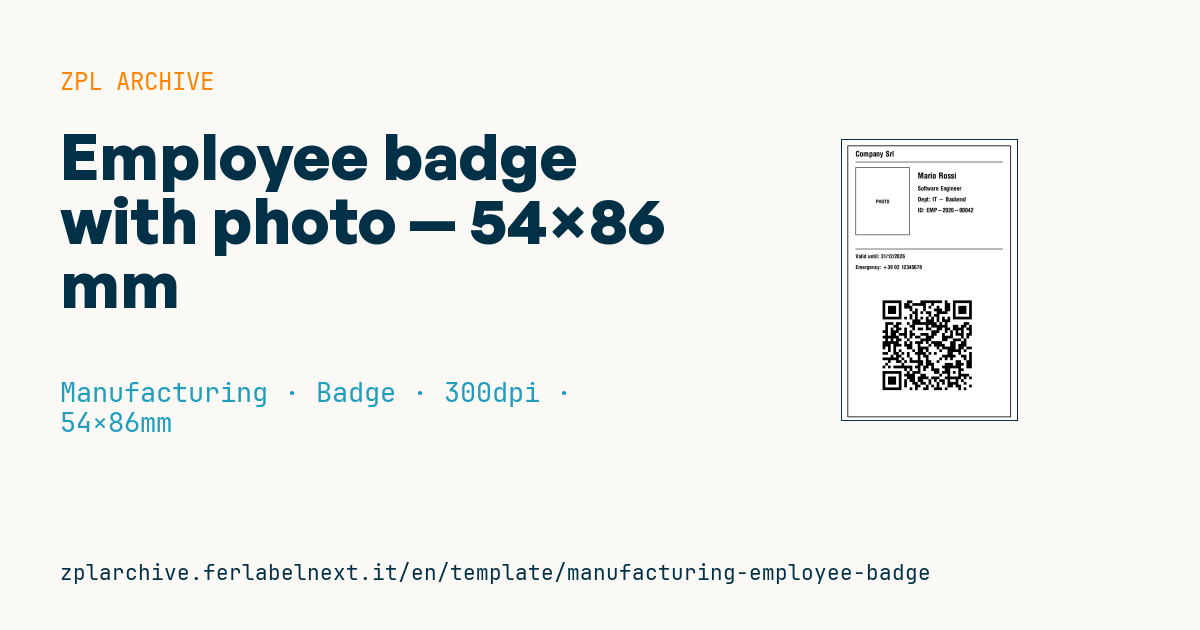
Employee badge
54×86 mm CR80 (standard card for wearable badges). The photo area is just a graphic placeholder — the photo is overlaid on the hardware side (color card printer).
Placeholders
-
company_name -
full_name -
role -
department -
badge_id— unique badge id -
valid_until—dd/mm/yyyy -
emergency_phone— company emergency number -
badge_url— URL in QR (verification + attendance)
When to use it
Manufacturers, construction sites, warehouses and service companies use it to make employees, temporary staff and contractors identifiable. The badge is worn on a lanyard or belt for the whole shift: it must show at a glance who the person is and who they work for, and the QR lets reception or the shift supervisor check online that it is still valid. If you print on an adhesive label to put on a card or rigid carrier, use synthetic stock and thermal transfer: direct thermal darkens with heat and wears off with friction.
Standards and requirements
The CR80 format matches the ID-1 size in ISO/IEC 7810 (85.60×53.98 mm) and fits standard badge holders and clips. Before printing on cards, check that your printer accepts ZPL: many card printers work through their own driver or SDK. Put only the data you need on the badge: name, photo and role are personal data under the GDPR, so apply data minimisation. Some sectors, such as construction, may have national rules on ID cards for workers: check the regulations in your country. At 300 dpi set ^PW to the card's real width to avoid clipping at the edge.
Common mistakes
- Using the QR as the only credential to open gates: a photo copies it. Physical access needs RFID/NFC or a server-side check.
- Encoding the name or employee number in clear text in the URL instead of an unguessable token.
- Leaving out the expiry date for temporary staff and contractors.
- Printing the name too small to read from a couple of metres.
FAQ
What size is a CR80 badge?
85.60×53.98 mm, the same as a payment card, defined as ID-1 in ISO/IEC 7810.
Can I print this badge on a Zebra label printer?
Yes, on adhesive labels of a similar size applied to a card or rigid carrier; a colour photo needs a card printer instead.
What should the QR contain?
A link to a protected verification page showing whether the badge is active, without exposing personal data to whoever scans it.
ZPL code
^XA
^PW638
^LL1016
^CI28
^FO20,20^GB605,1000,3^FS
^CF0,28^FO50,40^FD{{company_name}}^FS
^FO50,80^GB545,2,2^FS
^FO50,100^GB200,250,2^FS
^CF0,18^FO125,220^FDPHOTO^FS
^CF0,30^FO280,120^FD{{full_name}}^FS
^CF0,22^FO280,170^FD{{role}}^FS
^FO280,210^FDDept: {{department}}^FS
^FO280,250^FDID: {{badge_id}}^FS
^FO50,400^GB545,2,2^FS
^CF0,20
^FO50,420^FDValid until: {{valid_until}}^FS
^FO50,460^FDEmergency: {{emergency_phone}}^FS
^FO150,580^BQN,2,10
^FDQA,{{badge_url}}^FS
^XZ- Industry: Manufacturing
- Category: Badge
- DPI: 300
- Size: 54×86 mm
- Tags: QR Code
What this label contains
Barcodes
- QR Code
- 2D code for links, text and structured data, readable by any smartphone.
Elements
- 8 text fields
- 8 variable fields to fill in
- boxes and separator lines
Variable fields
| Field | Description | Example |
|---|---|---|
company_name | Company | Company Srl |
full_name | Name | Mario Rossi |
role | Role | Software Engineer |
department | Department | IT - Backend |
badge_id | Badge id | EMP-2026-00042 |
valid_until | Valid until | 31/12/2026 |
emergency_phone | Emergency | +39 02 12345678 |
badge_url | Badge URL | https://hr.company.local/badge/EMP-2026-00042 |
Format and printing
54×86 mm (2.13×3.39″) at 300 dpi: 638×1016 dots. Portrait.
Compatible Zebra printers
You need a printer with a 2″ printhead at 300 dpi, for example:
- Zebra ZD411 (desktop)
- Zebra ZD611 (desktop)
Any Zebra printer with a wider printhead and the same resolution works too.
The code is written for 300 dpi: on a printer with a different resolution the label prints larger or smaller and needs rescaling.
How to use it
- Open “Customize placeholders” and enter your data in the variable fields listed above.
- Check the preview: it is rendered from the same ZPL code you will send to the printer.
- Download the .zpl file or copy the code and send it to the printer: with “Print” through Zebra Browser Print, or as a raw file to port 9100 if the printer is on the network.
- Load 54×86 mm labels and make sure the printer is set to 300 dpi. For a different size use “Duplicate & edit” and adapt the layout in the builder.
Edit it in the editor
To change the layout, use “Duplicate & edit”: the template opens in the online ZPL editor, where you modify it and save it to your account for free.
Related templates
- Company asset tag with QR — 50×50 mm 203 dpi · Manufacturing · Asset
- Generic GS1-128 — 100×50 mm 203 dpi · Manufacturing · GS1-128
- Document control label — 60×40 mm 203 dpi · Manufacturing · Documents
- Kanban card — 100×70 mm 203 dpi · Manufacturing · Commercial label
- Fixed asset with QR — 50×30 mm 203 dpi · Manufacturing · Asset
- Preventive maintenance — 60×40 mm 203 dpi · Manufacturing · Asset
- Machine asset DataMatrix — 40×25 mm 300 dpi · Manufacturing · Asset
- Daily visitor pass — 100×70 mm 203 dpi · Manufacturing · Badge