Quality inspection label — 60×40 mm
Quality control outcome label: status (PASS/FAIL) in a contrast band, part, inspector, date and shift. For in-line acceptance or rejection.
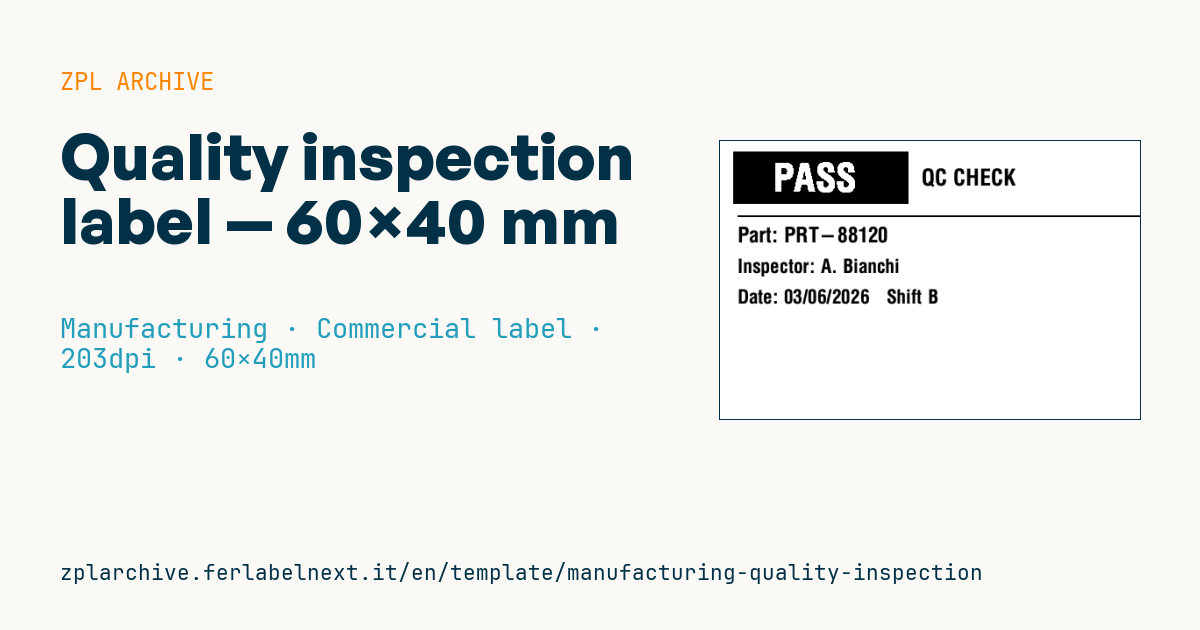
Quality inspection label
60×40 mm @ 203 dpi. Status in a reverse-contrast band (^FR), title, part, inspector, date+shift.
Placeholders
status_label— outcome (e.g.PASS)title_label— title (e.g.QC CHECK)part_number— partinspector/date/shift— inspector, date, shift
When to use it
The inspector or test operator applies it to parts, crates or pallets right after the check: at goods receipt, at the end of an operation or before shipping. It must tell anyone, without opening the ERP, whether the material can move on, must be scrapped or is on hold, and who checked it on which shift.
It is a short-lived label, so direct thermal paper is fine. For "hold" or "reject" statuses, consider destructible stock that cannot be peeled off and stuck on another container.
Standards and requirements
ISO 9001 requires you to identify the status of outputs with respect to inspection, control nonconforming outputs to prevent unintended use, and retain documented information on release, including the person who authorised it. It does not prescribe the label format; sectors such as automotive (IATF 16949) or customer-specific requirements may add rules, so check them.
The printer is monochrome: to tell outcomes apart, use pre-printed rolls in different colours in addition to the ^FR band. In thermal transfer, a large solid black band loads the ribbon unevenly: if you see ribbon wrinkles or grey areas, lower the speed with ^PR and adjust darkness with ^MD. In direct thermal, a solid band puts a lot of heat into the printhead: consider making it smaller or using a halftone pattern. The format is ^PW480 by ^LL320.
Common mistakes
- Using the same roll for PASS and FAIL and relying on the text alone.
- Applying the label before the inspection is closed.
- Not linking the label to the inspection report: add a lot or report number if you need traceability.
- Leaving a FAIL label on a part that was reworked and re-approved.
FAQ
What colours should quality control labels be?
Green for accepted, red for rejected and yellow for on hold are a common convention, not a standard. Define them in your procedure and use them consistently across departments.
Does the inspector have to sign the label?
Not necessarily: the inspector just needs to be identifiable. A name or initials tied to an authorised list usually satisfies auditors.
ZPL code
^XA
^PW480
^LL320
^CI28
^FO15,12^GB200,60,60^FS
^FR^CF0,44^FO60,25^FD{{status_label}}^FS
^CF0,26^FO230,32^FD{{title_label}}^FS
^FO20,85^GB460,2,2^FS
^CF0,24^FO20,98^FDPart: {{part_number}}^FS
^CF0,22^FO20,135^FDInspector: {{inspector}}^FS
^CF0,22^FO20,170^FDDate: {{date}}   {{shift}}^FS
^XZ- Industry: Manufacturing
- Category: Commercial label
- DPI: 203
- Size: 60×40 mm
- Tags: Compliance 2024, Inspection, Manufacturing, Quality control
What this label contains
Barcodes
This label contains no barcodes: it is made of text and graphics.
Elements
- 5 text fields
- 6 variable fields to fill in
- boxes and separator lines
Variable fields
| Field | Description | Example |
|---|---|---|
status_label | Status | PASS |
title_label | Title | QC CHECK |
part_number | Part | PRT-88120 |
inspector | Inspector | A. Bianchi |
date | Date | 03/06/2026 |
shift | Shift | Shift B |
Format and printing
60×40 mm (2.36×1.57″) at 203 dpi: 480×320 dots. Landscape.
Compatible Zebra printers
You need a printer with a 4″ printhead at 203 dpi, for example:
- Zebra ZD421 (desktop)
- Zebra ZD621 (desktop)
- Zebra GK420 (desktop)
- Zebra ZT231 (industrial)
- Zebra ZT411 (industrial)
- Zebra ZT610 (industrial)
- Zebra ZQ521 (mobile)
- Zebra ZQ630 (mobile)
Any Zebra printer with a wider printhead and the same resolution works too.
The code is written for 203 dpi: on a printer with a different resolution the label prints larger or smaller and needs rescaling.
How to use it
- Open “Customize placeholders” and enter your data in the variable fields listed above.
- Check the preview: it is rendered from the same ZPL code you will send to the printer.
- Download the .zpl file or copy the code and send it to the printer: with “Print” through Zebra Browser Print, or as a raw file to port 9100 if the printer is on the network.
- Load 60×40 mm labels and make sure the printer is set to 203 dpi. For a different size use “Duplicate & edit” and adapt the layout in the builder.
Edit it in the editor
To change the layout, use “Duplicate & edit”: the template opens in the online ZPL editor, where you modify it and save it to your account for free.
Related templates
- Company asset tag with QR — 50×50 mm 203 dpi · Manufacturing · Asset
- Generic GS1-128 — 100×50 mm 203 dpi · Manufacturing · GS1-128
- Document control label — 60×40 mm 203 dpi · Manufacturing · Documents
- Kanban card — 100×70 mm 203 dpi · Manufacturing · Commercial label
- Fixed asset with QR — 50×30 mm 203 dpi · Manufacturing · Asset
- Preventive maintenance — 60×40 mm 203 dpi · Manufacturing · Asset
- Daily visitor pass — 100×70 mm 203 dpi · Manufacturing · Badge
- Machine asset DataMatrix — 40×25 mm 300 dpi · Manufacturing · Asset