Multi-level bay location — 100×50 mm
Bay label with zone, aisle, bay number, levels and capacity. Dual Code128 + DataMatrix barcode.
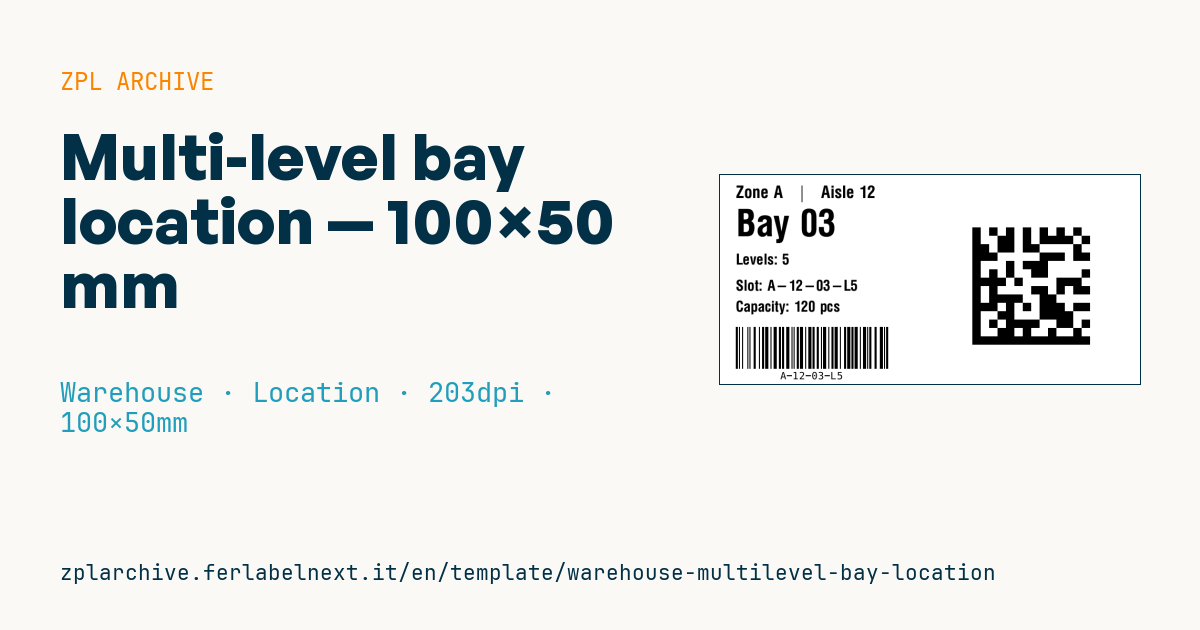
Multi-level bay location
100×50 mm format to apply on the bay base. Dual barcode supports both traditional scanning (Code128) and fixed-camera scanning (DataMatrix, more compact).
Placeholders
zone— warehouse zone (e.g.A,B)aisle— aislebay— bay numberlevel_count— number of vertical levelsslot_code— full slot codecapacity— capacity in pieces or pallets
When to use it
This label goes at the base of a pallet racking bay or a multi-level area and identifies the bay as a whole: zone, aisle, number and how many levels it holds. It is used in warehouses with very narrow aisle or reach trucks, where the driver confirms the position at floor level before lifting, and in sites with fixed readers or truck-mounted cameras, which read the compact DataMatrix more easily.
At floor level the label takes knocks, dust, washing and, in cold stores, condensation: use polyester or polypropylene in thermal transfer with a resin ribbon, ideally behind a label holder or a laminate.
Standards and requirements
DataMatrix is defined by ISO/IEC 16022 and in ZPL must be printed as ECC 200 (^BXN,size,200); Code 128 by ISO/IEC 15417. Print quality is verified with ISO/IEC 15415 for DataMatrix and ISO/IEC 15416 for Code 128. No standard dictates how locations are coded: define a fixed scheme (zone-aisle-bay-level) and use it identically in the WMS, the barcodes and the text. At 203 dpi a one-dot DataMatrix module is too small; for longer read distances, increase the module.
Common mistakes
- Encoding different data in the Code 128 and the DataMatrix, so the same place ends up with two codes.
- Labelling only the base and expecting a standard handheld to read the upper levels: you need long-range scanners or per-level labels.
- Printing capacity without a unit, leaving pieces and pallets ambiguous.
- Using paper labels on uprights exposed to impacts and washing.
FAQ
Is Code 128 or DataMatrix better for locations?
Code 128 is read by any laser scanner; DataMatrix needs an imager but takes less space and reads in any orientation. Keeping both helps while you migrate terminals.
Does every level need its own label?
If operators confirm picks per level, yes. The bay label is for orientation and for confirming the bay.
ZPL code
^XA
^PW799
^LL400
^CI28
^CF0,32^FO30,20^FDZone {{zone}}   |   Aisle {{aisle}}^FS
^CF0,70^FO30,65^FDBay {{bay}}^FS
^CF0,28^FO30,150^FDLevels: {{level_count}}^FS
^FO30,200^FDSlot: {{slot_code}}^FS
^FO30,240^FDCapacity: {{capacity}}^FS
^BY2,2,80
^FO30,290^BCN,80,Y,N,N^FD{{slot_code}}^FS
^FO480,100^BXN,16,200^FD{{slot_code}}^FS
^XZWhat this label contains
Barcodes
- Code 128
- High-density linear barcode that encodes the full ASCII set: ideal for tracking numbers, internal codes and alphanumeric IDs.
- Data Matrix
- Very compact 2D code, readable even at a few millimetres: component marking, PCBs and asset tags.
Elements
- 5 text fields
- 6 variable fields to fill in
Variable fields
| Field | Description | Example |
|---|---|---|
zone | Zone | A |
aisle | Aisle | 12 |
bay | Bay | 03 |
level_count | Levels | 5 |
slot_code | Slot code | A-12-03-L5 |
capacity | Capacity | 120 pcs |
Format and printing
100×50 mm (3.94×1.97″) at 203 dpi: 799×400 dots. Landscape.
Compatible Zebra printers
You need a printer with a 4″ printhead at 203 dpi, for example:
- Zebra ZD421 (desktop)
- Zebra ZD621 (desktop)
- Zebra GK420 (desktop)
- Zebra ZT231 (industrial)
- Zebra ZT411 (industrial)
- Zebra ZT610 (industrial)
- Zebra ZQ521 (mobile)
- Zebra ZQ630 (mobile)
Any Zebra printer with a wider printhead and the same resolution works too.
The code is written for 203 dpi: on a printer with a different resolution the label prints larger or smaller and needs rescaling.
How to use it
- Open “Customize placeholders” and enter your data in the variable fields listed above.
- Check the preview: it is rendered from the same ZPL code you will send to the printer.
- Download the .zpl file or copy the code and send it to the printer: with “Print” through Zebra Browser Print, or as a raw file to port 9100 if the printer is on the network.
- Load 100×50 mm labels and make sure the printer is set to 203 dpi. For a different size use “Duplicate & edit” and adapt the layout in the builder.
Edit it in the editor
To change the layout, use “Duplicate & edit”: the template opens in the online ZPL editor, where you modify it and save it to your account for free.
Related templates
- Single rack location — 50×30 mm 203 dpi · Warehouse · Location
- Shelf-edge / bin label — 40×20 mm 300 dpi · Warehouse · Location
- GS1 SSCC pallet — 100×150 mm 203 dpi · Warehouse · SSCC
- Cross-dock receiving — 100×70 mm 203 dpi · Warehouse · Cross-docking
- Pick face label with QR — 60×40 mm 203 dpi · Warehouse · Picking
- Annual inventory serial — 60×40 mm 203 dpi · Warehouse · Inventory
- Zone / aisle sign — 100×50 mm 203 dpi · Warehouse · Location
- Quality hold label — 70×50 mm 203 dpi · Warehouse · Inventory