Pick face label with QR — 60×40 mm
Pick face label with a QR to the item in the WMS, location code, item, description and min/max replenishment levels.
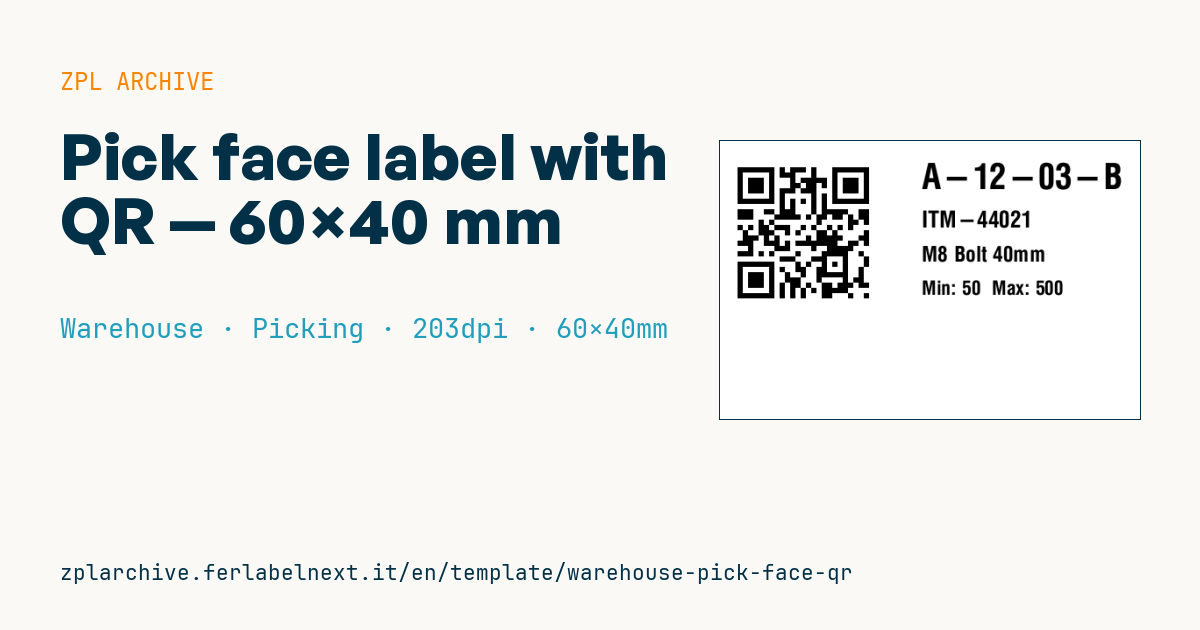
Pick face label with QR
60×40 mm @ 203 dpi. QR on the left (link to the item in the WMS), on the right location, item, description and min/max levels.
Placeholders
-
pick_url— item URL in the WMS -
location_code— location -
item_code— item -
description— description -
min_qty/max_qty— replenishment levels
When to use it
This label goes on the beam of a ground or first-level pick face, where operators take units for orders. Pickers confirm item and location; replenishment staff see the min/max levels at a glance and, by scanning the QR with a terminal or tablet, open the item record in the WMS with stock and movements. It is common in e-commerce, spare-parts and distribution warehouses with many SKUs on shelving.
A pick face stays in place for months, until slotting changes: use thermal transfer on polypropylene, possibly in a C-profile label holder on the beam.
Standards and requirements
QR Code is defined by ISO/IEC 18004 and in ZPL is printed with ^BQN,2,magnification; the data field needs a prefix with error correction level and input mode, for example ^FDMA, followed by the URL. Level M is a good compromise for labels that may get dirty. At 300 dpi a low magnification gives tiny modules: test reading at the actual working distance. There is no standard for pick face labels; the practical requirements are consistency with WMS slotting and a readable location code.
Common mistakes
- Encoding long URLs with session parameters: the QR gets dense and the link expires.
- Not reprinting the label when min/max levels or the item assigned to the face change.
- Assuming the link works from anyone's smartphone: the WMS usually requires the company network and a login.
- Placing the QR too close to the beam edge, without a quiet zone of at least 4 modules.
FAQ
Should I encode a URL or just the item code?
If the terminals are integrated with the WMS, the item or location code is shorter and does not depend on the server address. A URL is useful for looking up the record in a browser.
What are min and max for on a pick face?
They tell you when to request replenishment from reserve and how far to fill. Printing them helps flag anomalies without checking the system.
ZPL code
^XA
^PW480
^LL320
^CI28
^FO20,20^BQN,2,6^FDLA,{{pick_url}}^FS
^CF0,40^FO230,25^FD{{location_code}}^FS
^CF0,26^FO230,80^FD{{item_code}}^FS
^CF0,24^FO230,120^FD{{description}}^FS
^CF0,22^FO230,160^FDMin: {{min_qty}}  Max: {{max_qty}}^FS
^XZ- Industry: Warehouse
- Category: Picking
- DPI: 203
- Size: 60×40 mm
- Tags: Location, Picking, QR Code, Warehouse
What this label contains
Barcodes
- QR Code
- 2D code for links, text and structured data, readable by any smartphone.
Elements
- 4 text fields
- 6 variable fields to fill in
Variable fields
| Field | Description | Example |
|---|---|---|
pick_url | WMS URL | https://wms.example/item/44021 |
location_code | Location | A-12-03-B |
item_code | Item | ITM-44021 |
description | Description | M8 Bolt 40mm |
min_qty | Min | 50 |
max_qty | Max | 500 |
Format and printing
60×40 mm (2.36×1.57″) at 203 dpi: 480×320 dots. Landscape.
Compatible Zebra printers
You need a printer with a 4″ printhead at 203 dpi, for example:
- Zebra ZD421 (desktop)
- Zebra ZD621 (desktop)
- Zebra GK420 (desktop)
- Zebra ZT231 (industrial)
- Zebra ZT411 (industrial)
- Zebra ZT610 (industrial)
- Zebra ZQ521 (mobile)
- Zebra ZQ630 (mobile)
Any Zebra printer with a wider printhead and the same resolution works too.
The code is written for 203 dpi: on a printer with a different resolution the label prints larger or smaller and needs rescaling.
How to use it
- Open “Customize placeholders” and enter your data in the variable fields listed above.
- Check the preview: it is rendered from the same ZPL code you will send to the printer.
- Download the .zpl file or copy the code and send it to the printer: with “Print” through Zebra Browser Print, or as a raw file to port 9100 if the printer is on the network.
- Load 60×40 mm labels and make sure the printer is set to 203 dpi. For a different size use “Duplicate & edit” and adapt the layout in the builder.
Edit it in the editor
To change the layout, use “Duplicate & edit”: the template opens in the online ZPL editor, where you modify it and save it to your account for free.
Related templates
- Multi-level bay location — 100×50 mm 203 dpi · Warehouse · Location
- Single rack location — 50×30 mm 203 dpi · Warehouse · Location
- Shelf-edge / bin label — 40×20 mm 300 dpi · Warehouse · Location
- GS1 SSCC pallet — 100×150 mm 203 dpi · Warehouse · SSCC
- Cross-dock receiving — 100×70 mm 203 dpi · Warehouse · Cross-docking
- Zone / aisle sign — 100×50 mm 203 dpi · Warehouse · Location
- Quality hold label — 70×50 mm 203 dpi · Warehouse · Inventory
- Annual inventory serial — 60×40 mm 203 dpi · Warehouse · Inventory