Single rack location — 50×30 mm
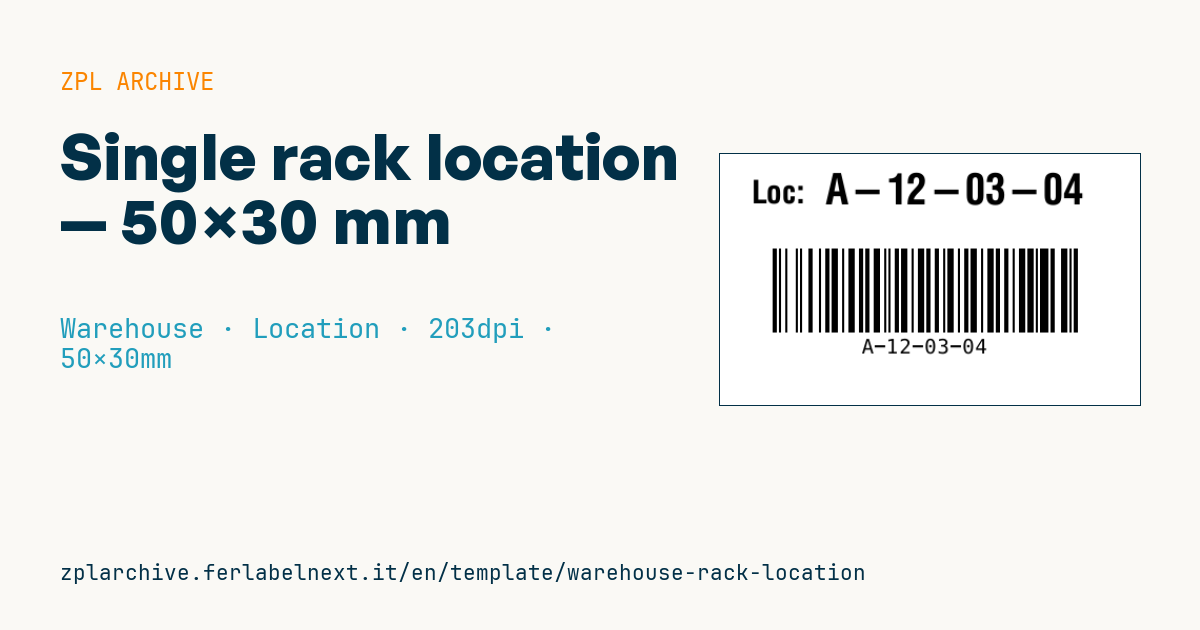
Compact label to identify a single rack location with both text code and Code128 barcode.
Single rack location
50×30 mm format to apply on the rack post. The code is both human-readable and scannable.
Placeholders
location_code— location code (common convention:<aisle>-<rack>-<level>-<slot>, e.g.A-12-03-04)
When to use it
This label identifies a single pallet position or shelf slot and is scanned by forklift drivers and pickers to confirm putaway and picking in the WMS. It is the proof that goods were placed in exactly that spot: if the code is wrong or unreadable, the item is "lost" in the system even though it is physically in the building.
On fixed racking you would normally use polypropylene or polyester printed by thermal transfer, because the label has to last for years and survive knocks from forks. In cold rooms you need a low-temperature adhesive, applied before the surface gets cold.
Standards and requirements
There is no specific standard for location labels: the real requirement is consistency with the location master data in your WMS. For linear barcode print quality the reference is ISO/IEC 15416, useful if you check output with a verifier. In ZPL the module width is set with ^BY: at 203 dpi a module of 2-3 dots is a good trade-off on a 50 mm label. Keep the quiet zone on both sides of the Code 128, and if the code is numeric only, Code 128 can use the more compact subset C.
Common mistakes
- Using direct thermal stock: the code fades within months, especially near windows or skylights.
- Choosing ambiguous characters (O and 0, I and 1) that operators mix up when typing codes by hand.
- Printing the same location twice during a relabelling project and leaving the old copy in place.
FAQ
Is Code 128 or a QR code better for rack locations?
Code 128 reads on any scanner, including laser models, and is enough for short codes. QR or Data Matrix make sense when space is tight or your fleet uses 2D imagers.
How do I label the upper rack levels?
A common approach is a multi-level label at floor level or on the first beam, with arrows pointing to each level. Alternatively, use larger labels read by long-range scanners.
ZPL code
^XA
^PW400
^LL240
^CI28
^CF0,30^FO30,25^FDLoc:^FS
^CF0,40^FO100,18^FD{{location_code}}^FS
^BY2,2,80
^FO50,90^BCN,80,Y,N,N^FD{{location_code}}^FS
^XZWhat this label contains
Barcodes
- Code 128
- High-density linear barcode that encodes the full ASCII set: ideal for tracking numbers, internal codes and alphanumeric IDs.
Elements
- 2 text fields
- 1 variable field to fill in
Variable fields
| Field | Description | Example |
|---|---|---|
location_code | Location code | A-12-03-04 |
Format and printing
50×30 mm (1.97×1.18″) at 203 dpi: 400×240 dots. Landscape.
Compatible Zebra printers
You need a printer with a 2″ printhead at 203 dpi, for example:
- Zebra ZD411 (desktop)
- Zebra ZD611 (desktop)
- Zebra ZQ220 (mobile)
- Zebra ZQ310 (mobile)
Any Zebra printer with a wider printhead and the same resolution works too.
The code is written for 203 dpi: on a printer with a different resolution the label prints larger or smaller and needs rescaling.
How to use it
- Open “Customize placeholders” and enter your data in the variable fields listed above.
- Check the preview: it is rendered from the same ZPL code you will send to the printer.
- Download the .zpl file or copy the code and send it to the printer: with “Print” through Zebra Browser Print, or as a raw file to port 9100 if the printer is on the network.
- Load 50×30 mm labels and make sure the printer is set to 203 dpi. For a different size use “Duplicate & edit” and adapt the layout in the builder.
Edit it in the editor
To change the layout, use “Duplicate & edit”: the template opens in the online ZPL editor, where you modify it and save it to your account for free.
Related templates
- Multi-level bay location — 100×50 mm 203 dpi · Warehouse · Location
- Shelf-edge / bin label — 40×20 mm 300 dpi · Warehouse · Location
- Cross-dock receiving — 100×70 mm 203 dpi · Warehouse · Cross-docking
- GS1 SSCC pallet — 100×150 mm 203 dpi · Warehouse · SSCC
- Pick face label with QR — 60×40 mm 203 dpi · Warehouse · Picking
- WMS tote label — 70×50 mm 203 dpi · Warehouse · Picking
- Zone / aisle sign — 100×50 mm 203 dpi · Warehouse · Location
- Quality hold label — 70×50 mm 203 dpi · Warehouse · Inventory