Annual inventory serial — 60×40 mm
Label used during annual inventory count: SKU, location, counted vs system quantity, operator.
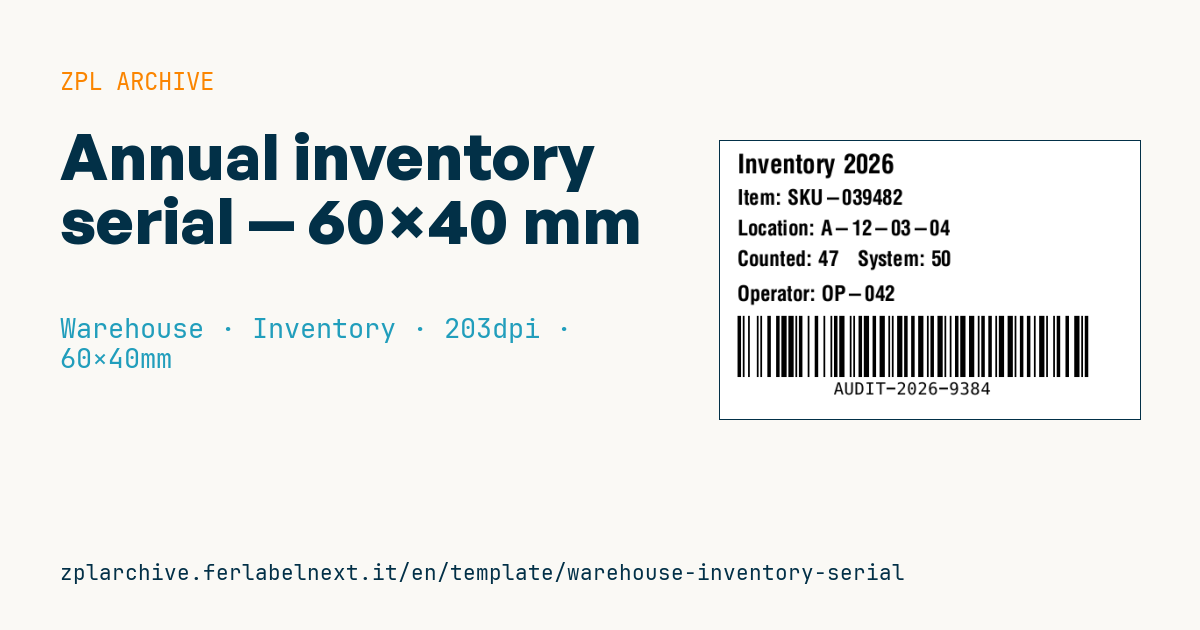
Annual inventory
60×40 mm format. One label per count record. The unique audit_id enables re-verification.
Placeholders
inventory_year— e.g.2026item_sku— item codelocation— location countedcounted_qty— quantity countedsystem_qty— system quantity (to highlight discrepancies)operator— operator idaudit_id— unique count id
When to use it
During the year-end physical inventory, every count record becomes a "count tag" with a unique ID. This label is printed after the counted quantity has been entered and goes on the location or pallet: whoever does the second count or spot check scans the barcode and finds the exact record, with counted versus system quantity already visible. Manufacturers and distributors that shut the warehouse for a day or two and use separate count and check teams rely on it.
Labels stay in place until adjustments are closed, a few weeks at most, so direct thermal paper is adequate unless they sit in sunlight or near heat.
Standards and requirements
There is no labelling standard for stocktaking. Control requirements are what matter: sequential IDs with no gaps, so you can prove no tag went missing; a freeze on movements during the count; traceability of who counted. If your financial statements are audited, the auditor may attend the count as provided by auditing standard ISA 501: agree procedures and forms with them in advance. Legal and tax inventory obligations depend on the country, so check them with your adviser.
Common mistakes
- Printing the label with the system quantity before counting, which biases the operator.
- Voiding or reprinting tags without recording the voided ID, breaking the control sequence.
- Having two teams count the same location without reconciling the IDs.
- Removing the labels before differences have been analysed and approved.
FAQ
Why should count IDs be sequential?
So that at the end you can show every tag issued was returned and recorded. A gap in the sequence points to a missing record.
What should I do when counted and system quantities differ?
Have another person recount the location before adjusting. If the difference remains, post the adjustment and record the cause.
ZPL code
^XA
^PW480
^LL320
^CI28
^CF0,30^FO20,15^FDInventory {{inventory_year}}^FS
^CF0,24
^FO20,55^FDItem: {{item_sku}}^FS
^FO20,90^FDLocation: {{location}}^FS
^FO20,125^FDCounted: {{counted_qty}}   System: {{system_qty}}^FS
^FO20,165^FDOperator: {{operator}}^FS
^BY2,2,70
^FO20,200^BCN,70,Y,N,N^FD{{audit_id}}^FS
^XZWhat this label contains
Barcodes
- Code 128
- High-density linear barcode that encodes the full ASCII set: ideal for tracking numbers, internal codes and alphanumeric IDs.
Elements
- 5 text fields
- 7 variable fields to fill in
Variable fields
| Field | Description | Example |
|---|---|---|
inventory_year | Inventory year | 2026 |
item_sku | SKU | SKU-039482 |
location | Location | A-12-03-04 |
counted_qty | Counted qty | 47 |
system_qty | System qty | 50 |
operator | Operator | OP-042 |
audit_id | Audit id | AUDIT-2026-9384 |
Format and printing
60×40 mm (2.36×1.57″) at 203 dpi: 480×320 dots. Landscape.
Compatible Zebra printers
You need a printer with a 4″ printhead at 203 dpi, for example:
- Zebra ZD421 (desktop)
- Zebra ZD621 (desktop)
- Zebra GK420 (desktop)
- Zebra ZT231 (industrial)
- Zebra ZT411 (industrial)
- Zebra ZT610 (industrial)
- Zebra ZQ521 (mobile)
- Zebra ZQ630 (mobile)
Any Zebra printer with a wider printhead and the same resolution works too.
The code is written for 203 dpi: on a printer with a different resolution the label prints larger or smaller and needs rescaling.
How to use it
- Open “Customize placeholders” and enter your data in the variable fields listed above.
- Check the preview: it is rendered from the same ZPL code you will send to the printer.
- Download the .zpl file or copy the code and send it to the printer: with “Print” through Zebra Browser Print, or as a raw file to port 9100 if the printer is on the network.
- Load 60×40 mm labels and make sure the printer is set to 203 dpi. For a different size use “Duplicate & edit” and adapt the layout in the builder.
Edit it in the editor
To change the layout, use “Duplicate & edit”: the template opens in the online ZPL editor, where you modify it and save it to your account for free.
Related templates
- Multi-level bay location — 100×50 mm 203 dpi · Warehouse · Location
- Single rack location — 50×30 mm 203 dpi · Warehouse · Location
- Shelf-edge / bin label — 40×20 mm 300 dpi · Warehouse · Location
- GS1 SSCC pallet — 100×150 mm 203 dpi · Warehouse · SSCC
- Pick face label with QR — 60×40 mm 203 dpi · Warehouse · Picking
- Cross-dock receiving — 100×70 mm 203 dpi · Warehouse · Cross-docking
- Putaway / location label — 60×40 mm 203 dpi · Warehouse · Location
- Cycle count label — 50×30 mm 203 dpi · Warehouse · Inventory