Putaway / location label — 60×40 mm
Putaway label with a DataMatrix of the location, the human-readable location code, item and quantity. To guide shelf refilling.
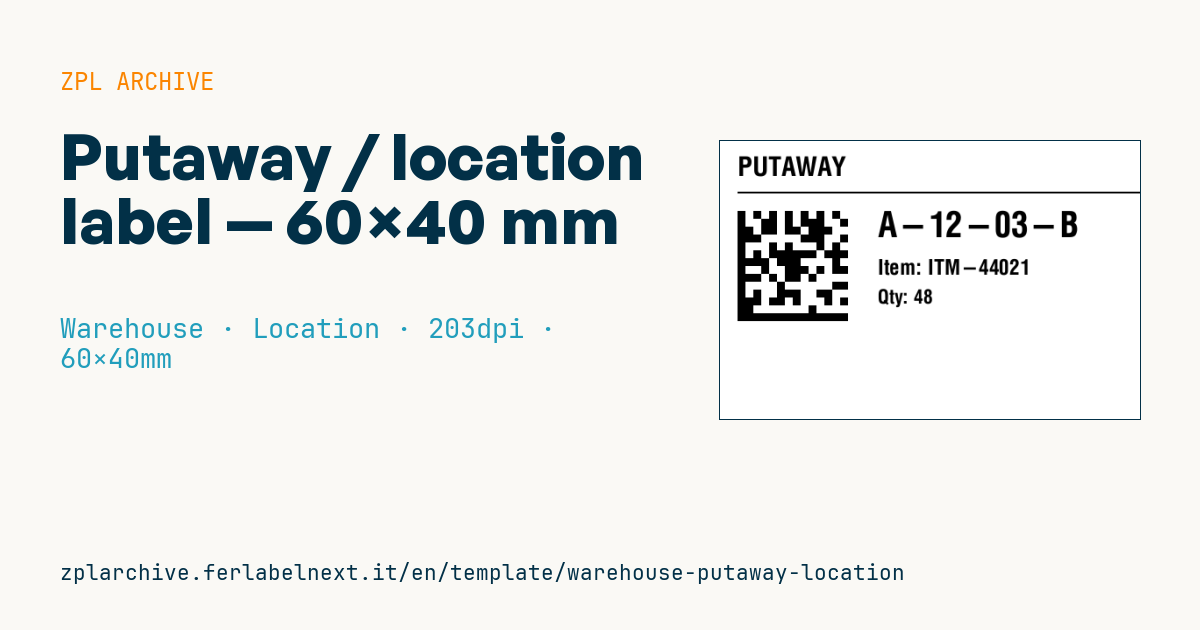
Putaway / location label
60×40 mm @ 203 dpi. Title, separator, location DataMatrix, large location code, item and quantity.
Placeholders
title_label— title (e.g.PUTAWAY)location_code— location code (e.g.A-12-03-B)item_code— itemquantity— quantity
When to use it
The putaway label is printed when the WMS assigns a destination location to freshly received goods or to a pick face replenishment. It goes on the carton, tote or pallet and tells the operator where to take it and how much to put away: the large location code reads while walking, and the DataMatrix serves imager terminals. Warehouses with system-directed putaway, where the operator does not choose the shelf, use it.
It stays on the unit until putaway, usually a few hours, so direct thermal paper is adequate, with removable adhesive if the container is reusable.
Standards and requirements
DataMatrix is defined by ISO/IEC 16022; in ZPL use ^BXN,module,200 for ECC 200. Since this is an internal code, you do not need the GS1 DataMatrix variant with FNC1. There is no specific standard for putaway labels: the main requirement is that the DataMatrix content matches the WMS location code character for character, separators included. Remember that 1D laser scanners cannot read 2D codes: you need imager terminals.
Common mistakes
- Confirming putaway by scanning the DataMatrix on this label instead of the fixed location label: the position check is lost.
- Encoding the location with separators that differ from the WMS (
A12-03versusA-12-03). - Using permanent adhesive on reusable totes, which end up with layers of old labels.
- Printing a DataMatrix module too small at 203 dpi, which terminals struggle to read.
FAQ
Why a DataMatrix rather than a Code 128?
DataMatrix takes less space for the same data and reads in any orientation, which helps with rotated cartons. It does require 2D imager terminals.
Should the operator scan this label or the shelf label?
Both have a purpose: this one identifies the task, the shelf label confirms the goods reached the right place.
ZPL code
^XA
^PW480
^LL320
^CI28
^CF0,30^FO20,18^FD{{title_label}}^FS
^FO20,58^GB460,2,2^FS
^FO20,80^BXN,9,200^FD{{location_code}}^FS
^CF0,40^FO180,80^FD{{location_code}}^FS
^CF0,24^FO180,135^FDItem: {{item_code}}^FS
^CF0,22^FO180,170^FDQty: {{quantity}}^FS
^XZ- Industry: Warehouse
- Category: Location
- DPI: 203
- Size: 60×40 mm
- Tags: DataMatrix, Inventory, Location, Warehouse
What this label contains
Barcodes
- Data Matrix
- Very compact 2D code, readable even at a few millimetres: component marking, PCBs and asset tags.
Elements
- 4 text fields
- 4 variable fields to fill in
- boxes and separator lines
Variable fields
| Field | Description | Example |
|---|---|---|
title_label | Title | PUTAWAY |
location_code | Location | A-12-03-B |
item_code | Item | ITM-44021 |
quantity | Quantity | 48 |
Format and printing
60×40 mm (2.36×1.57″) at 203 dpi: 480×320 dots. Landscape.
Compatible Zebra printers
You need a printer with a 4″ printhead at 203 dpi, for example:
- Zebra ZD421 (desktop)
- Zebra ZD621 (desktop)
- Zebra GK420 (desktop)
- Zebra ZT231 (industrial)
- Zebra ZT411 (industrial)
- Zebra ZT610 (industrial)
- Zebra ZQ521 (mobile)
- Zebra ZQ630 (mobile)
Any Zebra printer with a wider printhead and the same resolution works too.
The code is written for 203 dpi: on a printer with a different resolution the label prints larger or smaller and needs rescaling.
How to use it
- Open “Customize placeholders” and enter your data in the variable fields listed above.
- Check the preview: it is rendered from the same ZPL code you will send to the printer.
- Download the .zpl file or copy the code and send it to the printer: with “Print” through Zebra Browser Print, or as a raw file to port 9100 if the printer is on the network.
- Load 60×40 mm labels and make sure the printer is set to 203 dpi. For a different size use “Duplicate & edit” and adapt the layout in the builder.
Edit it in the editor
To change the layout, use “Duplicate & edit”: the template opens in the online ZPL editor, where you modify it and save it to your account for free.
Related templates
- Multi-level bay location — 100×50 mm 203 dpi · Warehouse · Location
- Single rack location — 50×30 mm 203 dpi · Warehouse · Location
- Shelf-edge / bin label — 40×20 mm 300 dpi · Warehouse · Location
- GS1 SSCC pallet — 100×150 mm 203 dpi · Warehouse · SSCC
- Cross-dock receiving — 100×70 mm 203 dpi · Warehouse · Cross-docking
- Pick face label with QR — 60×40 mm 203 dpi · Warehouse · Picking
- Annual inventory serial — 60×40 mm 203 dpi · Warehouse · Inventory
- Zone / aisle sign — 100×50 mm 203 dpi · Warehouse · Location