Clinical trial kit — 60×40 mm
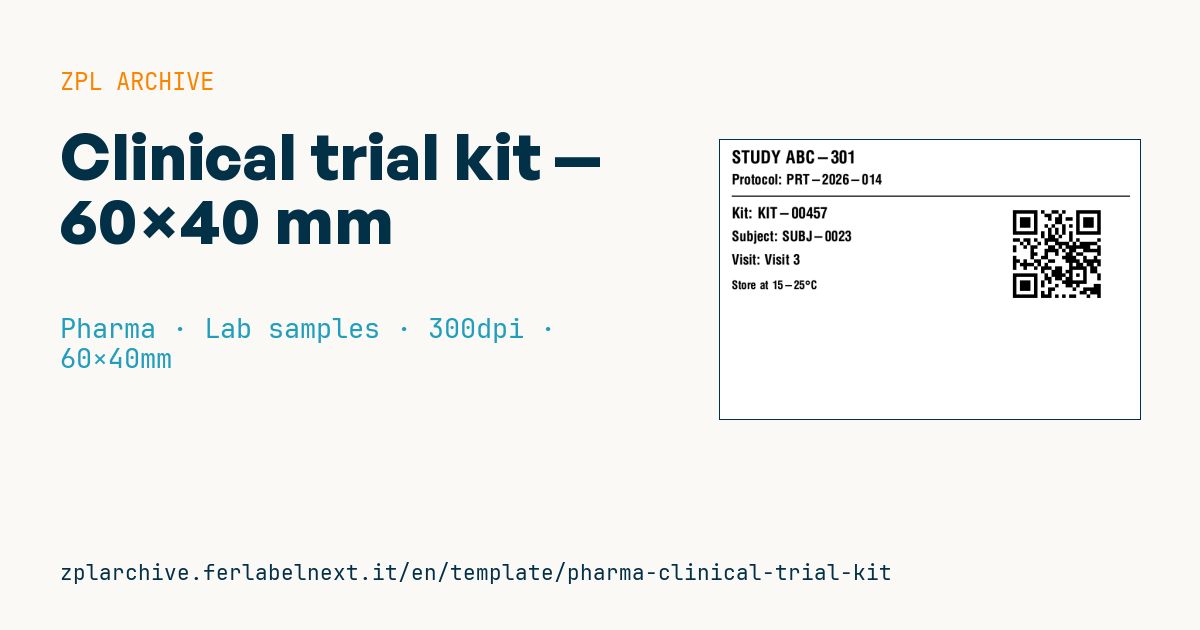
Label for a clinical trial kit: protocol, kit ID, subject, visit, storage and a QR to the trial management system (IRT/RTSM).
Clinical trial kit
60×40 mm @ 300 dpi. Study, protocol, separator, kit ID, subject, visit, storage and a QR (link to the IRT/RTSM system).
Placeholders
study_label— study name/codeprotocol— protocol numberkit_id— kit IDsubject_id— subject IDvisit— visitkit_url— trial system URLstorage— storage
When to use it
This label identifies an investigational medicinal product (IMP) kit shipped to a trial site. It is printed by the sponsor's clinical packaging team or by a clinical supply service provider. The kit is assigned to a subject through the IRT/RTSM system, which records which kit was dispensed at which visit. The label goes on cartons or bottles that are often refrigerated, so pick a synthetic thermal transfer stock when the kit stays cold or is handled for months.
In a blinded study the label must not reveal the treatment: the kit number is the only link to the treatment arm, and only the IRT resolves it.
Standards and requirements
In the EU, IMP labelling is governed by Regulation (EU) 536/2014, Annex VI, which lists the required particulars (sponsor, trial reference code, kit number, subject identifier, storage conditions, "for clinical trial use only" and so on) and possible simplifications. Text must be in the official language of the site's country. In the US, 21 CFR 312.6 applies. The final field list is set by the sponsor according to the protocol.
For the QR, use ^BQN,2 with a magnification suited to 300 dpi; add ^CI28 for accented and local characters.
Common mistakes
- Encoding unblinding data or the subject's personal data in the QR; it should only carry a kit reference.
- Forgetting the translation into the site country's language.
- Leaving too little space for subject and visit when the investigator writes them by hand.
- Printing QR codes too small for site readers, which are often phones or budget scanners.
FAQ
Can the QR contain the subject ID?
Better not: encode only a kit reference and let the IRT handle the link to the subject behind authenticated access.
Are booklet labels an option?
Yes, they are common in multinational trials to hold several languages; this template is a single-panel label.
ZPL code
^XA
^PW709
^LL472
^CI28
^CF0,30^FO20,18^FD{{study_label}}^FS
^CF0,24^FO20,58^FDProtocol: {{protocol}}^FS
^FO20,95^GB680,2,2^FS
^FO500,110^BQN,2,6^FDLA,{{kit_url}}^FS
^CF0,26^FO20,115^FDKit: {{kit_id}}^FS
^CF0,24^FO20,155^FDSubject: {{subject_id}}^FS
^CF0,24^FO20,195^FDVisit: {{visit}}^FS
^CF0,20^FO20,240^FDStore {{storage}}^FS
^XZ- Industry: Pharma
- Category: Lab samples
- DPI: 300
- Size: 60×40 mm
- Tags: Clinical trial, Pharma, QR Code, Serialization
What this label contains
Barcodes
- QR Code
- 2D code for links, text and structured data, readable by any smartphone.
Elements
- 6 text fields
- 7 variable fields to fill in
- boxes and separator lines
Variable fields
| Field | Description | Example |
|---|---|---|
study_label | Study | STUDY ABC-301 |
protocol | Protocol | PRT-2026-014 |
kit_id | Kit ID | KIT-00457 |
subject_id | Subject ID | SUBJ-0023 |
visit | Visit | Visit 3 |
kit_url | Kit URL | https://irt.example/kit/457 |
storage | Storage | at 15-25°C |
Format and printing
60×40 mm (2.36×1.57″) at 300 dpi: 709×472 dots. Landscape.
Compatible Zebra printers
You need a printer with a 4″ printhead at 300 dpi, for example:
- Zebra ZD421 (desktop)
- Zebra ZD621 (desktop)
- Zebra ZT231 (industrial)
- Zebra ZT411 (industrial)
- Zebra ZT610 (industrial)
Any Zebra printer with a wider printhead and the same resolution works too.
The code is written for 300 dpi: on a printer with a different resolution the label prints larger or smaller and needs rescaling.
How to use it
- Open “Customize placeholders” and enter your data in the variable fields listed above.
- Check the preview: it is rendered from the same ZPL code you will send to the printer.
- Download the .zpl file or copy the code and send it to the printer: with “Print” through Zebra Browser Print, or as a raw file to port 9100 if the printer is on the network.
- Load 60×40 mm labels and make sure the printer is set to 300 dpi. For a different size use “Duplicate & edit” and adapt the layout in the builder.
Edit it in the editor
To change the layout, use “Duplicate & edit”: the template opens in the online ZPL editor, where you modify it and save it to your account for free.
Related templates
- GS1 DataMatrix pharma — 25×10 mm (600 dpi) 600 dpi · Pharma · GS1 DataMatrix
- Patient check-in & appointment ticket — 80×150 mm 203 dpi · Pharma · Patient check-in & flow
- UDI medical device — 50×30 mm 300 dpi · Pharma · Drug packaging
- Sample tube Aztec — 25×25 mm 300 dpi · Pharma · Lab samples
- GS1 serialization DataMatrix — 40×25 mm 300 dpi · Pharma · GS1 DataMatrix
- Lab sample — 70×40 mm 300 dpi · Pharma · Lab samples
- Patient wristband — 200×25 mm 300 dpi · Pharma · Patient wristband
- Prescription label — 70×40 mm 203 dpi · Pharma · Drug packaging