Discounted price tag — 50×30 mm
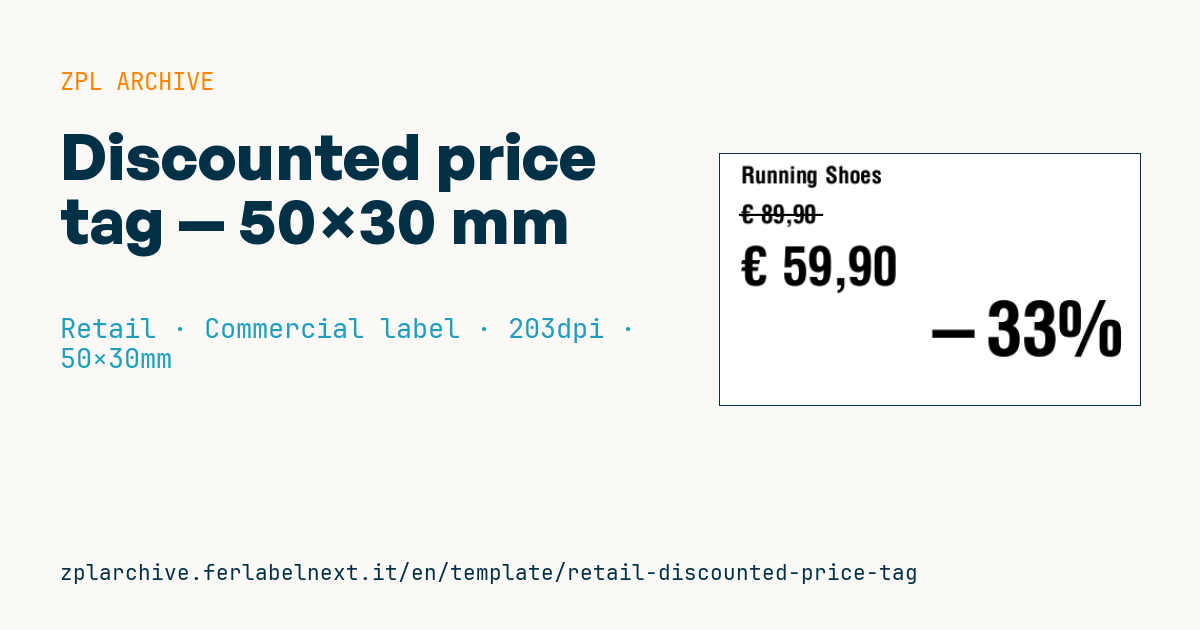
Tag with the previous price struck through, the new price highlighted and the discount percentage. Communicates the saving at a glance.
Discounted price tag
50×30 mm @ 203 dpi. The old price is struck through with a line (^GB), the new price is in a large font, the discount percentage sits on the right.
Placeholders
-
product_name -
currency— currency symbol -
old_price— previous price (struck through) -
new_price— new price -
discount_pct— discount percentage (number only)
When to use it
It is used on the shelf or hung on the item when a product is reduced and the store wants to show the previous price, the new price and the percentage together. It is typical of fashion, consumer electronics, housewares and seasonal sales. It is replaced at every price change, so generate it from the system that holds the price history rather than by hand.
Standards and requirements
This is the most direct case of Directive 98/6/EC as amended by Directive (EU) 2019/2161: the struck-through price must be the lowest price applied in the 30 days before the reduction, and the percentage must be calculated from it. Some exemptions, for example for perishable goods or uninterrupted progressive reductions, depend on national transposition: check them. The new price remains the final price including VAT and, where required, is accompanied by the unit price.
In ZPL, the ^GB strike line should cross the digits at mid-height, 2-3 dots thick at 203 dpi: the old price must stay readable.
Common mistakes
- Striking through the recommended retail price or last month's price instead of the 30-day lowest price.
- Calculating the percentage by hand and rounding up: customers can redo the maths.
- Using a strike line so thick that the old price becomes unreadable.
- Swapping
old_priceandnew_pricein a CSV import: always check that the new price is lower.
FAQ
Which price should be struck through?
The lowest price applied in the 30 days before the reduction. If the product was already discounted during that period, the base is that discounted price, unless national rules allow an exemption for progressive reductions.
Is the discount percentage mandatory?
No, showing the previous and new prices is enough. If you show a percentage, it must match the 30-day reference price.
ZPL code
^XA
^PW400
^LL240
^CI28
^CF0,22^FO20,12^FD{{product_name}}^FS
^CF0,24^FO20,48^FD{{currency}} {{old_price}}^FS
^FO18,57^GB80,2,2^FS
^CF0,50^FO20,88^FD{{currency}} {{new_price}}^FS
^CF0,70^FO190,140^FD-{{discount_pct}}%^FS
^XZ- Industry: Retail
- Category: Commercial label
- DPI: 203
- Size: 50×30 mm
- Tags: Discount, Price tag, Sale, Strikethrough price
What this label contains
Barcodes
This label contains no barcodes: it is made of text and graphics.
Elements
- 4 text fields
- 5 variable fields to fill in
- boxes and separator lines
Variable fields
| Field | Description | Example |
|---|---|---|
product_name | Product | Running Shoes |
currency | Currency | € |
old_price | Old price | 89,90 |
new_price | New price | 59,90 |
discount_pct | Discount % | 33 |
Format and printing
50×30 mm (1.97×1.18″) at 203 dpi: 400×240 dots. Landscape.
Compatible Zebra printers
You need a printer with a 2″ printhead at 203 dpi, for example:
- Zebra ZD411 (desktop)
- Zebra ZD611 (desktop)
- Zebra ZQ220 (mobile)
- Zebra ZQ310 (mobile)
Any Zebra printer with a wider printhead and the same resolution works too.
The code is written for 203 dpi: on a printer with a different resolution the label prints larger or smaller and needs rescaling.
How to use it
- Open “Customize placeholders” and enter your data in the variable fields listed above.
- Check the preview: it is rendered from the same ZPL code you will send to the printer.
- Download the .zpl file or copy the code and send it to the printer: with “Print” through Zebra Browser Print, or as a raw file to port 9100 if the printer is on the network.
- Load 50×30 mm labels and make sure the printer is set to 203 dpi. For a different size use “Duplicate & edit” and adapt the layout in the builder.
Edit it in the editor
To change the layout, use “Duplicate & edit”: the template opens in the online ZPL editor, where you modify it and save it to your account for free.
Related templates
- Black Friday with offer QR — 50×40 mm 300 dpi · Retail · Commercial label
- EAN13 + bilingual IT/EN description — 60×40 mm 203 dpi · Retail · Commercial label
- Handmade soap label with logo — 50×40 mm 203 dpi · Retail · Commercial label
- -50% off sticker — 40×40 mm 203 dpi · Retail · Commercial label
- Price + product name — 70×40 mm 203 dpi · Retail · Commercial label
- Summer sale with EAN-13 — 60×40 mm 203 dpi · Retail · Commercial label
- Clearance window poster — 70×50 mm 203 dpi · Retail · Commercial label
- Candle label with logo — 60×40 mm 203 dpi · Retail · Commercial label