Authenticity tag with logo — 50×50 mm
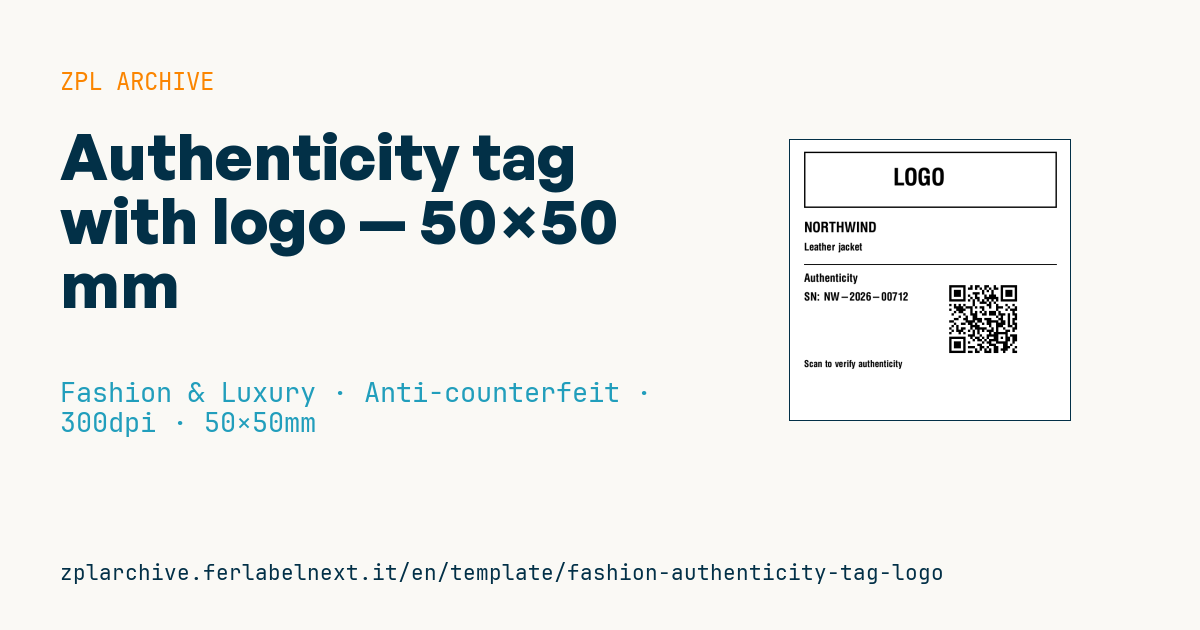
Anti-counterfeit label with logo area, brand, product, serial number and authenticity verification QR.
Authenticity tag with logo
50×50 mm @ 300 dpi. Anti-counterfeit label hung on the garment. At the top the logo area: a placeholder frame with "LOGO" text, to be replaced with the real brand logo (^GF image). The QR links to the authenticity verification page.
Placeholders
brandproduct_nameserial— serial numberauth_url— URL in the QR (authenticity verification)
The "LOGO" frame is a placeholder: replace it with your logo as a graphic (
^GF).
When to use it
An authenticity tag hangs on handbags, small leather goods, limited-edition sneakers or high-end garments. Its job is different from the price ticket: letting the customer, the retailer or the after-sales team confirm that this specific item is genuine. The serial printed in clear text and the one inside the QR must match, and both must point to a record created in the brand's database at print time.
If the tag stays with the product after purchase, use a synthetic stock or coated board printed by thermal transfer with a wax-resin or resin ribbon: direct thermal paper loses contrast within months.
Standards and requirements
There is no mandatory standard for the layout of an authenticity tag. The QR code follows ISO/IEC 18004, and ISO 22383 provides criteria for selecting and evaluating authentication solutions. Practical requirements: a unique, non-guessable serial, a short URL to keep the symbol small, and a quiet zone of at least 4 modules around the QR.
In ZPL you build the QR with ^BQN,2,5 and ^FDQA, followed by the URL: the first letter sets the error correction level (L, M, Q, H). Store the logo converted to ^GF in printer memory with ~DG and recall it with ^XG instead of resending it with every label.
Common mistakes
- Using sequential serials: anyone who sees one can work out the valid ones.
- Relying on the QR alone, which a photocopier can clone; the real protection is server-side detection of repeated scans of the same serial.
- Encoding a long URL with tracking parameters, which makes the symbol denser.
FAQ
Is a printed QR code enough to stop counterfeiting?
No, because it can be copied. It becomes effective when every serial is unique and registered, and the verification page flags codes scanned many times or in implausible locations.
Which error correction level should I use?
On a clean tag with no graphics over the symbol, M or Q is a good balance between robustness and size. Use H if you expect scratches or frequent abrasion.
ZPL code
^XA
^PW591
^LL591
^CI28
^FO30,25^GB540,120,3^FS
^CF0,50^FO205,60^FD LOGO ^FS
^CF0,30^FO30,175^FD{{brand}}^FS
^CF0,22^FO30,220^FD{{product_name}}^FS
^FO30,265^GB540,2,2^FS
^CF0,24^FO30,285^FDAuthenticity^FS
^FO30,325^FDSN: {{serial}}^FS
^FO340,300^BQN,2,5^FDLA,{{auth_url}}^FS
^CF0,20^FO30,470^FDScan to verify authenticity^FS
^XZ- Industry: Fashion & Luxury
- Category: Anti-counterfeit
- DPI: 300
- Size: 50×50 mm
- Tags: Anti-counterfeit, Logo, Premium, QR Code, Serial number
What this label contains
Barcodes
- QR Code
- 2D code for links, text and structured data, readable by any smartphone.
Elements
- 6 text fields
- 4 variable fields to fill in
- boxes and separator lines
Variable fields
| Field | Description | Example |
|---|---|---|
brand | Brand | NORTHWIND |
product_name | Product | Leather jacket |
serial | Serial | NW-2026-00712 |
auth_url | Auth URL | https://northwind.example/auth/NW-2026-00712 |
Format and printing
50×50 mm (1.97×1.97″) at 300 dpi: 591×591 dots. Square.
Compatible Zebra printers
You need a printer with a 2″ printhead at 300 dpi, for example:
- Zebra ZD411 (desktop)
- Zebra ZD611 (desktop)
Any Zebra printer with a wider printhead and the same resolution works too.
The code is written for 300 dpi: on a printer with a different resolution the label prints larger or smaller and needs rescaling.
How to use it
- Open “Customize placeholders” and enter your data in the variable fields listed above.
- Check the preview: it is rendered from the same ZPL code you will send to the printer.
- Download the .zpl file or copy the code and send it to the printer: with “Print” through Zebra Browser Print, or as a raw file to port 9100 if the printer is on the network.
- Load 50×50 mm labels and make sure the printer is set to 300 dpi. For a different size use “Duplicate & edit” and adapt the layout in the builder.
Edit it in the editor
To change the layout, use “Duplicate & edit”: the template opens in the online ZPL editor, where you modify it and save it to your account for free.
Related templates
- Swing ticket with logo — 45×80 mm 300 dpi · Fashion & Luxury · Hangtag
- Premium hangtag with anti-counterfeit QR — 60×90 mm 300 dpi · Fashion & Luxury · Hangtag
- Garment hangtag — 50×80 mm 203 dpi · Fashion & Luxury · Hangtag
- Premium care label with logo — 40×60 mm 300 dpi · Fashion & Luxury · Care label
- Boutique price + brand — 60×40 mm 203 dpi · Fashion & Luxury · Boutique price & brand
- Multilingual textile care label — 40×60 mm 203 dpi · Fashion & Luxury · Care label
- Shoe box label with logo — 70×50 mm 203 dpi · Fashion & Luxury · Boutique price & brand
- Jewelry certificate + serial — 50×30 mm 300 dpi · Fashion & Luxury · Jewelry & watches