Cross-dock routing label (QR) — 100×50 mm
Cross-docking sortation label: inbound dock, outbound door, lane, wave, carrier, parcel count and routing QR code.
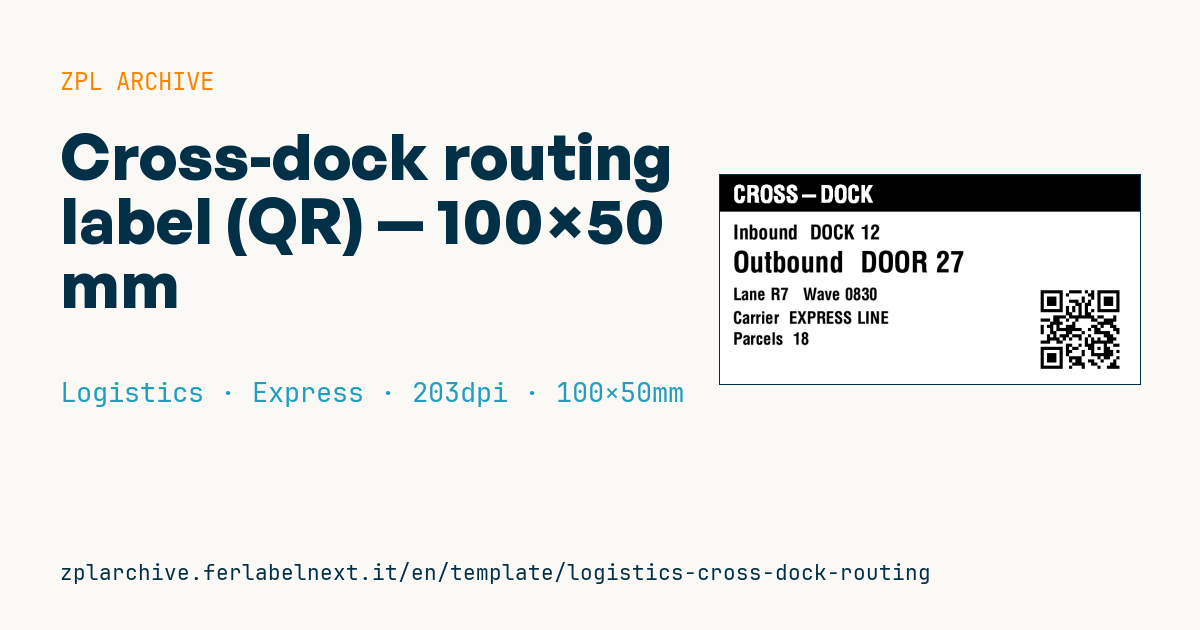
Cross-dock routing label
100×50 mm @ 203 dpi. For cross-docking sortation: shows from which inbound dock to which outbound door to route the parcel, with lane and wave. The QR carries the routing payload for the WMS.
Placeholders
inbound_dock— receiving dockoutbound_door— shipping doorlane— lanewave— picking wavecarrier— carrierparcels— parcel countqr_payload— routing data in the QR
When to use it
The cross-dock label is printed at receiving, as soon as a carton or pallet is unloaded and identified, so the forklift or pallet truck driver knows straight away where it goes: which outbound door, which staging lane, which wave. Goods stay on the dock for a few hours, so the label is short-lived and usually printed on direct thermal paper. In cold rooms or on damp docks, choose a low-temperature adhesive.
The outbound door must be readable from a few metres away, while the QR lets the scanner confirm the load goes onto the right vehicle.
Standards and requirements
There is no specific standard for internal sortation labels: the content depends on your WMS and the site's rules. The QR follows ISO/IEC 18004. If the unit already carries a GS1 logistic label with an SSCC or a carrier label, that remains the official identifier: the cross-dock label goes next to it and must not cover it. Putting the SSCC or unit ID itself in the QR is a good idea, so the scan picks up the existing record. In ZPL, use a large ^A0 font for door and lane, and leave a quiet zone of at least 4 modules around the QR.
Common mistakes
- Sticking the label over the carrier barcode or the SSCC, so the unit becomes unreadable downstream.
- Printing the whole wave in advance and not reprinting after doors are reassigned.
- Printing the door number small: the driver should read it without leaving the truck.
- Encoding data the WMS does not recognise, which forces manual entry.
FAQ
QR or Code 128 for sortation?
QR holds more data and reads in any orientation; Code 128 is fine if your fixed scanners only read linear codes. Decide based on the readers installed.
Do I need thermal transfer?
Usually not, because the label lives for hours or days. It helps if goods sit outside for a long time or in very humid areas.
ZPL code
^XA
^LL400
^CI28
^PW800
^FO0,0^GB800,70,70^FS
^FR^CF0,45^FO25,20^FDCROSS-DOCK^FS
^CF0,38^FO25,95^FDInbound  {{inbound_dock}}^FS
^CF0,55^FO25,145^FDOutbound  {{outbound_door}}^FS
^CF0,32^FO25,215^FDLane {{lane}}   Wave {{wave}}^FS
^FO25,260^FDCarrier  {{carrier}}^FS
^FO25,300^FDParcels  {{parcels}}^FS
^FO610,210^BQN,2,6^FDQA,{{qr_payload}}^FS
^XZWhat this label contains
Barcodes
- QR Code
- 2D code for links, text and structured data, readable by any smartphone.
Elements
- 6 text fields
- 7 variable fields to fill in
- boxes and separator lines
Variable fields
| Field | Description | Example |
|---|---|---|
inbound_dock | Inbound dock | DOCK 12 |
outbound_door | Outbound door | DOOR 27 |
lane | Lane | R7 |
wave | Wave | 0830 |
carrier | Carrier | EXPRESS LINE |
parcels | Parcels | 18 |
qr_payload | QR payload | XD|D27|R7|W0830 |
Format and printing
100×50 mm (3.94×1.97″) at 203 dpi: 799×400 dots. Landscape.
Compatible Zebra printers
You need a printer with a 4″ printhead at 203 dpi, for example:
- Zebra ZD421 (desktop)
- Zebra ZD621 (desktop)
- Zebra GK420 (desktop)
- Zebra ZT231 (industrial)
- Zebra ZT411 (industrial)
- Zebra ZT610 (industrial)
- Zebra ZQ521 (mobile)
- Zebra ZQ630 (mobile)
Any Zebra printer with a wider printhead and the same resolution works too.
The code is written for 203 dpi: on a printer with a different resolution the label prints larger or smaller and needs rescaling.
How to use it
- Open “Customize placeholders” and enter your data in the variable fields listed above.
- Check the preview: it is rendered from the same ZPL code you will send to the printer.
- Download the .zpl file or copy the code and send it to the printer: with “Print” through Zebra Browser Print, or as a raw file to port 9100 if the printer is on the network.
- Load 100×50 mm labels and make sure the printer is set to 203 dpi. For a different size use “Duplicate & edit” and adapt the layout in the builder.
Edit it in the editor
To change the layout, use “Duplicate & edit”: the template opens in the online ZPL editor, where you modify it and save it to your account for free.
Related templates
- IATA air baggage tag — 50×220 mm 203 dpi · Logistics · Luggage
- Fragile / Handle with care — 100×70 mm 203 dpi · Logistics · Express
- DHL Express Worldwide AWB — 100×150 mm 203 dpi · Logistics · Express
- Pallet Label GS1 SSCC — 148×210 mm (A5) 203 dpi · Logistics · Pallet
- Generic Return Label — 100×150 mm 203 dpi · Logistics · Return
- ISO 6346 sea container label — 100×70 mm 203 dpi · Logistics · Express
- Basic Sender/Recipient — 100×70 mm 203 dpi · Logistics · Express
- FedEx International AWB — 100×150 mm 203 dpi · Logistics · Air