Production batch DataMatrix — 60×40 mm
Production batch label with a DataMatrix of the traceability data, product, batch ID, date and production line. For process traceability.
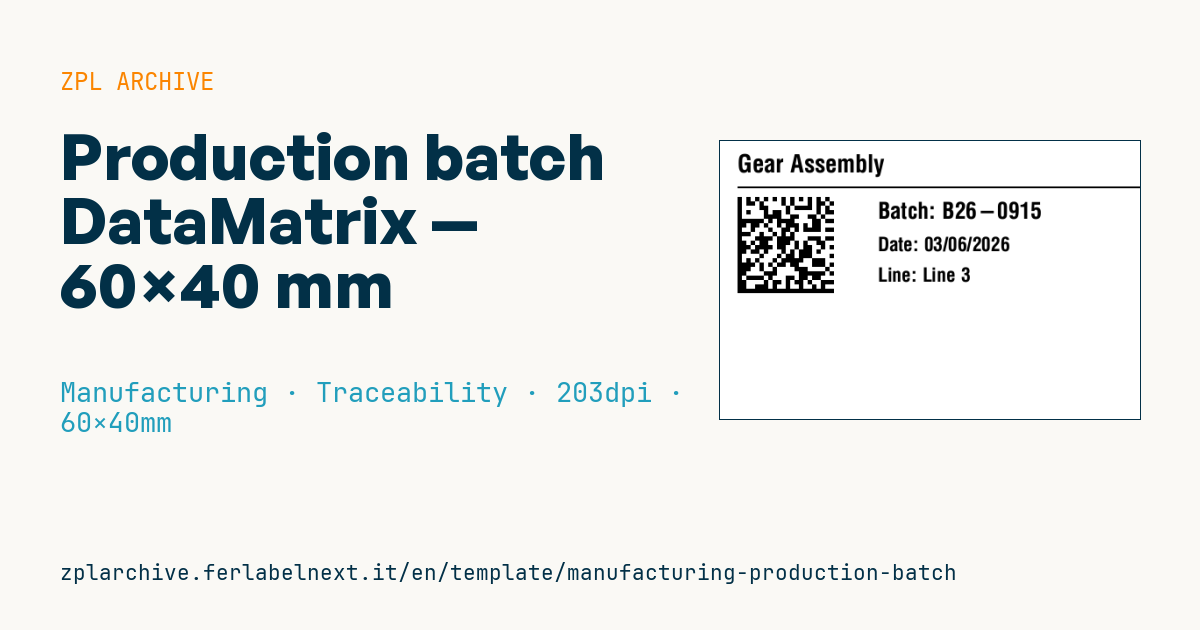
Production batch DataMatrix
60×40 mm @ 203 dpi. Product, separator, batch-data DataMatrix, batch ID, date and line.
Placeholders
product_name— product namebatch_data— DataMatrix data stringbatch_id— batch IDprod_date— production dateline— production line
When to use it
It is printed at the end of the line or when a production order is closed, and applied to crates, cartons or containers of semi-finished and finished goods. One scan of the DataMatrix gives line and date and, through the ERP or MES, raw materials and process parameters: exactly what you need to limit a recall or a nonconformity investigation to the affected batch.
For cartons leaving the warehouse within days, direct thermal paper can be enough; if the batch stays in storage for months, in cold rooms or near heat sources, choose thermal transfer on coated paper or synthetic stock.
Standards and requirements
The symbology is defined by ISO/IEC 16022 (ECC 200, ^BX with quality 200). For internal use the content is free; if the label goes to customers or along the supply chain, a GS1 DataMatrix with AIs from the GS1 General Specifications is better: (01) GTIN, (11) production date YYMMDD, (10) batch. GS1 DataMatrix requires FNC1 in first position: check the ZPL manual for how to set the ^BX escape character to insert it.
Put fixed-length AIs first and the batch (10) last, so you avoid a separator after a variable-length field. At 203 dpi a 3-4 dot module (0.375-0.5 mm) reads well with warehouse imagers.
Common mistakes
- Encoding a batch in the DataMatrix that differs from the human-readable one.
- Using the same batch ID on two lines on the same day, which widens any recall.
- Filling the DataMatrix with long strings that force a smaller module.
FAQ
Generic DataMatrix or GS1 DataMatrix for batch labels?
If the data stays in-house, a DataMatrix with your own structure is fine. If customers or the supply chain must read it with standard systems, use GS1 syntax with AIs.
Can a smartphone read this DataMatrix?
Yes, many apps read it, but a GS1 DataMatrix is shown as raw text without splitting the AIs. On the shop floor use a handheld configured to parse them.
ZPL code
^XA
^PW480
^LL320
^CI28
^CF0,28^FO20,15^FD{{product_name}}^FS
^FO20,52^GB460,2,2^FS
^FO20,64^BXN,5,200^FD{{batch_data}}^FS
^CF0,26^FO180,70^FDBatch: {{batch_id}}^FS
^CF0,22^FO180,110^FDDate: {{prod_date}}^FS
^CF0,22^FO180,145^FDLine: {{line}}^FS
^XZ- Industry: Manufacturing
- Category: Traceability
- DPI: 203
- Size: 60×40 mm
- Tags: Batch, DataMatrix, Manufacturing, Traceability
What this label contains
Barcodes
- Data Matrix
- Very compact 2D code, readable even at a few millimetres: component marking, PCBs and asset tags.
Elements
- 4 text fields
- 5 variable fields to fill in
- boxes and separator lines
Variable fields
| Field | Description | Example |
|---|---|---|
product_name | Product | Gear Assembly |
batch_data | DataMatrix data | BATCH:B26-0915|LINE:L3|D:20260603 |
batch_id | Batch ID | B26-0915 |
prod_date | Date | 03/06/2026 |
line | Line | Line 3 |
Format and printing
60×40 mm (2.36×1.57″) at 203 dpi: 480×320 dots. Landscape.
Compatible Zebra printers
You need a printer with a 4″ printhead at 203 dpi, for example:
- Zebra ZD421 (desktop)
- Zebra ZD621 (desktop)
- Zebra GK420 (desktop)
- Zebra ZT231 (industrial)
- Zebra ZT411 (industrial)
- Zebra ZT610 (industrial)
- Zebra ZQ521 (mobile)
- Zebra ZQ630 (mobile)
Any Zebra printer with a wider printhead and the same resolution works too.
The code is written for 203 dpi: on a printer with a different resolution the label prints larger or smaller and needs rescaling.
How to use it
- Open “Customize placeholders” and enter your data in the variable fields listed above.
- Check the preview: it is rendered from the same ZPL code you will send to the printer.
- Download the .zpl file or copy the code and send it to the printer: with “Print” through Zebra Browser Print, or as a raw file to port 9100 if the printer is on the network.
- Load 60×40 mm labels and make sure the printer is set to 203 dpi. For a different size use “Duplicate & edit” and adapt the layout in the builder.
Edit it in the editor
To change the layout, use “Duplicate & edit”: the template opens in the online ZPL editor, where you modify it and save it to your account for free.
Related templates
- Company asset tag with QR — 50×50 mm 203 dpi · Manufacturing · Asset
- Generic GS1-128 — 100×50 mm 203 dpi · Manufacturing · GS1-128
- Document control label — 60×40 mm 203 dpi · Manufacturing · Documents
- Kanban card — 100×70 mm 203 dpi · Manufacturing · Commercial label
- Fixed asset with QR — 50×30 mm 203 dpi · Manufacturing · Asset
- Preventive maintenance — 60×40 mm 203 dpi · Manufacturing · Asset
- Daily visitor pass — 100×70 mm 203 dpi · Manufacturing · Badge
- Machine asset DataMatrix — 40×25 mm 300 dpi · Manufacturing · Asset