Wedding favor tag with logo — 40×60 mm
Wedding favor tag with logo area, couple names, event date, thank you and event hashtag.
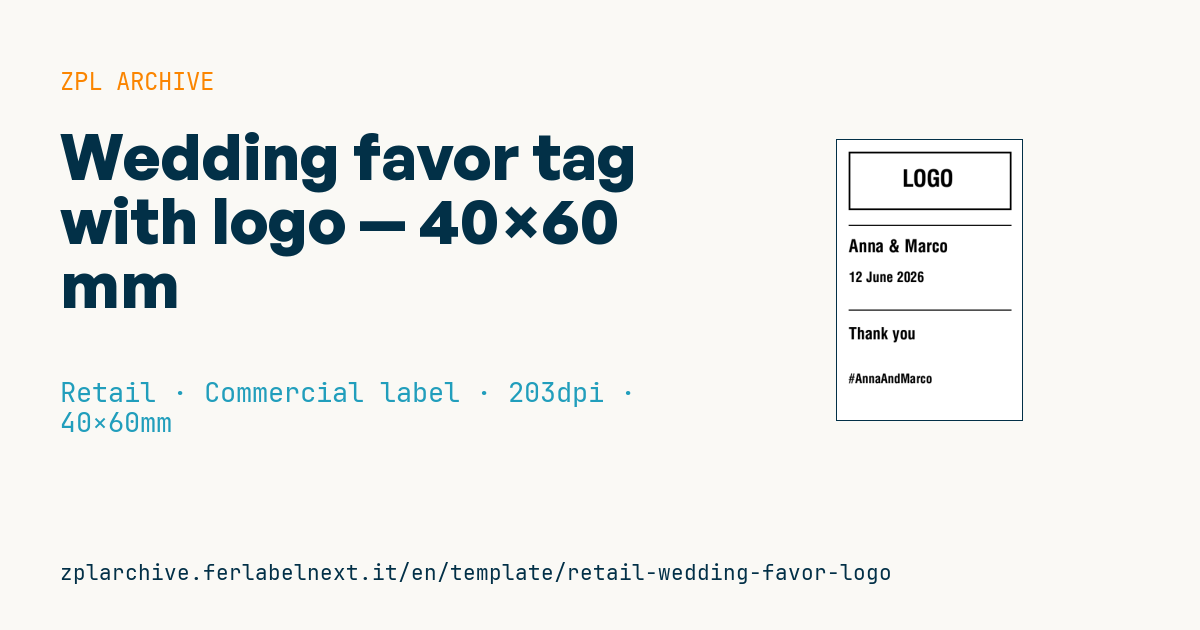
Wedding favor tag with logo
40×60 mm @ 203 dpi. Small tag to tie onto the wedding favor. At the top the logo area: a placeholder frame with "LOGO" text, to be replaced with the couple's real monogram or logo (^GF image).
Placeholders
couple_names— couple names (e.g.Anna & Marco)event_date— event datethank_you— thank you note (e.g.Thank you)hashtag— event hashtag (e.g.#AnnaAndMarco)
The "LOGO" frame is a placeholder: replace it with your monogram as a graphic (
^GF).
When to use it
Wedding favour shops, sugared almond makers, wedding planners and stationery workshops use it to prepare tags for hundreds of identical favours: it is tied with a ribbon to the bag of sugared almonds, the jar or the keepsake. Compared with offset printing it lets you produce short runs at the last minute, for example when the guest count changes.
The media is usually tag stock, often pearlescent or embossed, or printable satin ribbon, both by thermal transfer: a wedding favour is a keepsake that lasts years and direct thermal paper would yellow.
Standards and requirements
There is no standard for the tag: what matters is legibility, a clean look and correctly spelled names. If the favour contains sugared almonds or other prepacked food, the tag does not replace the information required by Regulation (EU) 1169/2011, which must stay on the pack; almonds are among the allergens that must be highlighted.
In ZPL use ^CI28 for accents and characters like &. Watch out for ^FH: the underscore is its default escape character, so a hashtag like #Anna_Marco must be written as _5F or you must choose a different escape character. On embossed stock lower the speed with ^PR and raise darkness with ~SD.
Common mistakes
- Leaving
^FHactive with a hashtag that contains an underscore: the printed text comes out wrong. - Skipping a test print on the final media: pearlescent stock can give a weaker black.
- Using a
^GFmonogram with hairlines that break up at 203 dpi. - Writing the date in a format that foreign guests read differently.
FAQ
Can a Zebra printer print on satin ribbon?
Yes, with thermal-transfer printable textile ribbons and a suitable ink ribbon. Always run a test first.
Does the favour tag need to list the ingredients of the sugared almonds?
No, as long as the almond pack already carries the mandatory information. The tag is purely decorative.
ZPL code
^XA
^LL480
^CI28
^PW320
^FO20,20^GB280,100,3^FS
^CF0,40^FO100,50^FD LOGO ^FS
^FO20,145^GB280,2,2^FS
^CF0,30^FO20,170^FD{{couple_names}}^FS
^CF0,24^FO20,225^FD{{event_date}}^FS
^FO20,290^GB280,2,2^FS
^CF0,28^FO20,320^FD{{thank_you}}^FS
^CF0,22^FO20,400^FD{{hashtag}}^FS
^XZ- Industry: Retail
- Category: Commercial label
- DPI: 203
- Size: 40×60 mm
- Tags: Gift, Logo, Wedding favor
What this label contains
Barcodes
This label contains no barcodes: it is made of text and graphics.
Elements
- 5 text fields
- 4 variable fields to fill in
- boxes and separator lines
Variable fields
| Field | Description | Example |
|---|---|---|
couple_names | Couple | Anna & Marco |
event_date | Date | 12 June 2026 |
thank_you | Thank you | Thank you |
hashtag | Hashtag | #AnnaAndMarco |
Format and printing
40×60 mm (1.57×2.36″) at 203 dpi: 320×480 dots. Portrait.
Compatible Zebra printers
You need a printer with a 2″ printhead at 203 dpi, for example:
- Zebra ZD411 (desktop)
- Zebra ZD611 (desktop)
- Zebra ZQ220 (mobile)
- Zebra ZQ310 (mobile)
Any Zebra printer with a wider printhead and the same resolution works too.
The code is written for 203 dpi: on a printer with a different resolution the label prints larger or smaller and needs rescaling.
How to use it
- Open “Customize placeholders” and enter your data in the variable fields listed above.
- Check the preview: it is rendered from the same ZPL code you will send to the printer.
- Download the .zpl file or copy the code and send it to the printer: with “Print” through Zebra Browser Print, or as a raw file to port 9100 if the printer is on the network.
- Load 40×60 mm labels and make sure the printer is set to 203 dpi. For a different size use “Duplicate & edit” and adapt the layout in the builder.
Edit it in the editor
To change the layout, use “Duplicate & edit”: the template opens in the online ZPL editor, where you modify it and save it to your account for free.
Related templates
- Black Friday with offer QR — 50×40 mm 300 dpi · Retail · Commercial label
- Handmade soap label with logo — 50×40 mm 203 dpi · Retail · Commercial label
- EAN13 + bilingual IT/EN description — 60×40 mm 203 dpi · Retail · Commercial label
- Price + product name — 70×40 mm 203 dpi · Retail · Commercial label
- -50% off sticker — 40×40 mm 203 dpi · Retail · Commercial label
- Candle label with logo — 60×40 mm 203 dpi · Retail · Commercial label
- Basic EAN13 product — 50×30 mm 203 dpi · Retail · Commercial label
- Summer sale with EAN-13 — 60×40 mm 203 dpi · Retail · Commercial label