Cooking instructions label — 70×50 mm
Label with cooking instructions (oven, microwave, pan) and a steaming pot pictogram drawn in ZPL. For ready meals and deli.
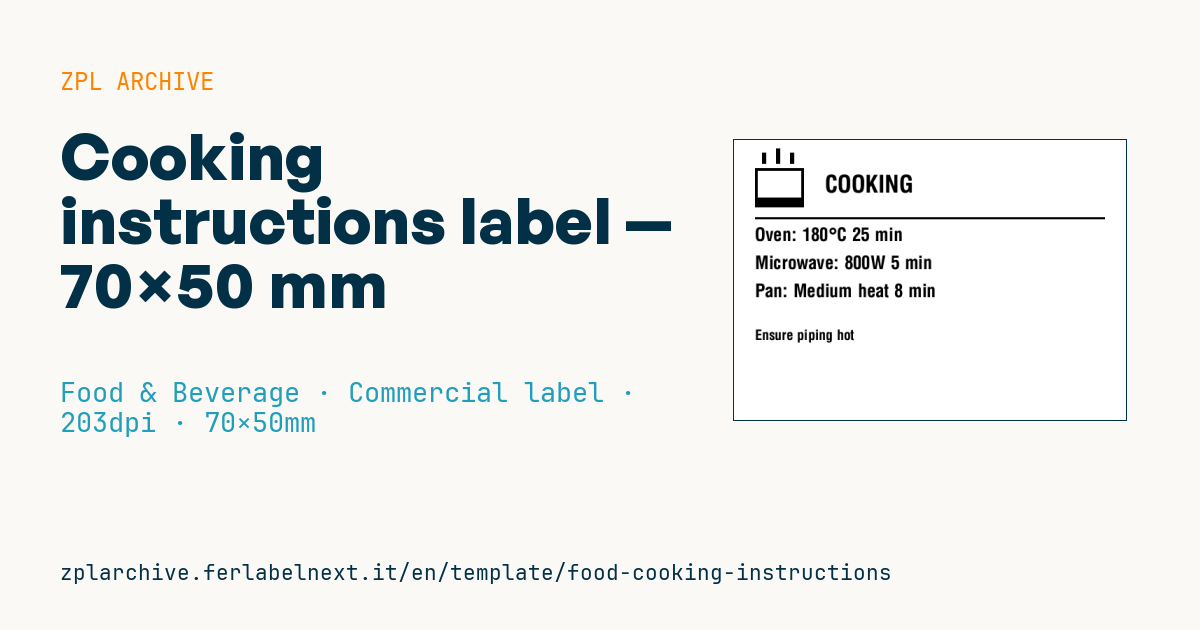
Cooking instructions label
70×50 mm @ 203 dpi. Steaming pot drawn with ZPL primitives, title, oven/microwave/pan lines and a note.
Placeholders
title_label— title (e.g.COOKING)oven— oven instructions (e.g.180°C 25 min)microwave— microwave (e.g.800W 5 min)pan— pan (e.g.Medium heat 8 min)note— note (e.g.Ensure piping hot)
When to use it
Delis, central kitchens, caterers and takeaway restaurants use it to explain how to reheat ready meals, lasagne, roasts or grilled vegetables sold in trays. It goes on the lid or sealing film, often next to the label with ingredients and date.
The tray travels from the fridge, sometimes the freezer, to the oven, and the label must be removed before cooking. You need an adhesive that holds in the cold but peels off without tearing. For chilled products with a few days of shelf life direct thermal paper is fine; if the tray is frozen, use a face stock and adhesive rated for low temperatures.
Standards and requirements
Regulation (EU) 1169/2011 makes instructions for use mandatory where it would be difficult to make appropriate use of the food without them, which is typically the case for meals that need reheating. No format is prescribed, but the instructions must be clear, tested and consistent with your HACCP plan, which defines safe times and temperatures for your product.
The degree sign needs care: set ^CI28 and, with ^CI28 active, send ° directly as UTF-8 or, with ^FH, as the hex sequence _C2_B0. With the default character set the symbol may print as the wrong character.
Common mistakes
- Giving the microwave power without saying whether the time is for one portion or the whole tray.
- Copying times from another product without testing them: different portion sizes and containers change the result.
- Forgetting to tell the customer to remove or pierce the film before microwaving.
- Printing the pictogram at high darkness on cheap paper: solid black areas smudge.
FAQ
Are cooking instructions mandatory on ready meals?
They are when the product cannot be used properly without them, as with a dish that has to be reheated in the oven. A product eaten cold straight from the pack does not need them.
How should I indicate a fan oven?
State the oven type next to the temperature, because fan and conventional ovens need different times; test both if the customer may use either.
ZPL code
^XA
^PW559
^LL400
^CI28
^FO30,40^GB70,46,4^FS
^FO30,86^GB70,10,10^FS
^FO40,18^GB6,16,6^FS
^FO60,12^GB6,22,6^FS
^FO80,18^GB6,16,6^FS
^CF0,34^FO130,50^FD{{title_label}}^FS
^FO30,110^GB500,3,3^FS
^CF0,26^FO30,125^FDOven: {{oven}}^FS
^CF0,26^FO30,165^FDMicrowave: {{microwave}}^FS
^CF0,26^FO30,205^FDPan: {{pan}}^FS
^CF0,20^FO30,270^FD{{note}}^FS
^XZ- Industry: Food & Beverage
- Category: Commercial label
- DPI: 203
- Size: 70×50 mm
- Tags: Cooking instructions, Food, HoReCa
What this label contains
Barcodes
This label contains no barcodes: it is made of text and graphics.
Elements
- 5 text fields
- 5 variable fields to fill in
- boxes and separator lines
Variable fields
| Field | Description | Example |
|---|---|---|
title_label | Title | COOKING |
oven | Oven | 180°C 25 min |
microwave | Microwave | 800W 5 min |
pan | Pan | Medium heat 8 min |
note | Note | Ensure piping hot |
Format and printing
70×50 mm (2.76×1.97″) at 203 dpi: 559×400 dots. Landscape.
Compatible Zebra printers
You need a printer with a 4″ printhead at 203 dpi, for example:
- Zebra ZD421 (desktop)
- Zebra ZD621 (desktop)
- Zebra GK420 (desktop)
- Zebra ZT231 (industrial)
- Zebra ZT411 (industrial)
- Zebra ZT610 (industrial)
- Zebra ZQ521 (mobile)
- Zebra ZQ630 (mobile)
Any Zebra printer with a wider printhead and the same resolution works too.
The code is written for 203 dpi: on a printer with a different resolution the label prints larger or smaller and needs rescaling.
How to use it
- Open “Customize placeholders” and enter your data in the variable fields listed above.
- Check the preview: it is rendered from the same ZPL code you will send to the printer.
- Download the .zpl file or copy the code and send it to the printer: with “Print” through Zebra Browser Print, or as a raw file to port 9100 if the printer is on the network.
- Load 70×50 mm labels and make sure the printer is set to 203 dpi. For a different size use “Duplicate & edit” and adapt the layout in the builder.
Edit it in the editor
To change the layout, use “Duplicate & edit”: the template opens in the online ZPL editor, where you modify it and save it to your account for free.
Related templates
- Wine gift label with logo — 50×90 mm 300 dpi · Food & Beverage · Commercial label
- Beverage bottle label — 40×80 mm 300 dpi · Food & Beverage · Commercial label
- Price per kg label — 50×40 mm 203 dpi · Food & Beverage · Commercial label
- Food label with allergens — 70×100 mm 300 dpi · Food & Beverage · Commercial label
- GS1 DataMatrix traceability — 30×30 mm 300 dpi · Food & Beverage · GS1 DataMatrix
- Artisan jam label with logo — 50×60 mm 203 dpi · Food & Beverage · Commercial label
- Food nutrition label — 70×100 mm 300 dpi · Food & Beverage · Nutritional label
- Compact lot + expiry — 50×25 mm 300 dpi · Food & Beverage · Traceability