Gift swing tag with logo — 50×80 mm
Vertical gift tag with logo area, brand, recipient, sender, message and occasion.
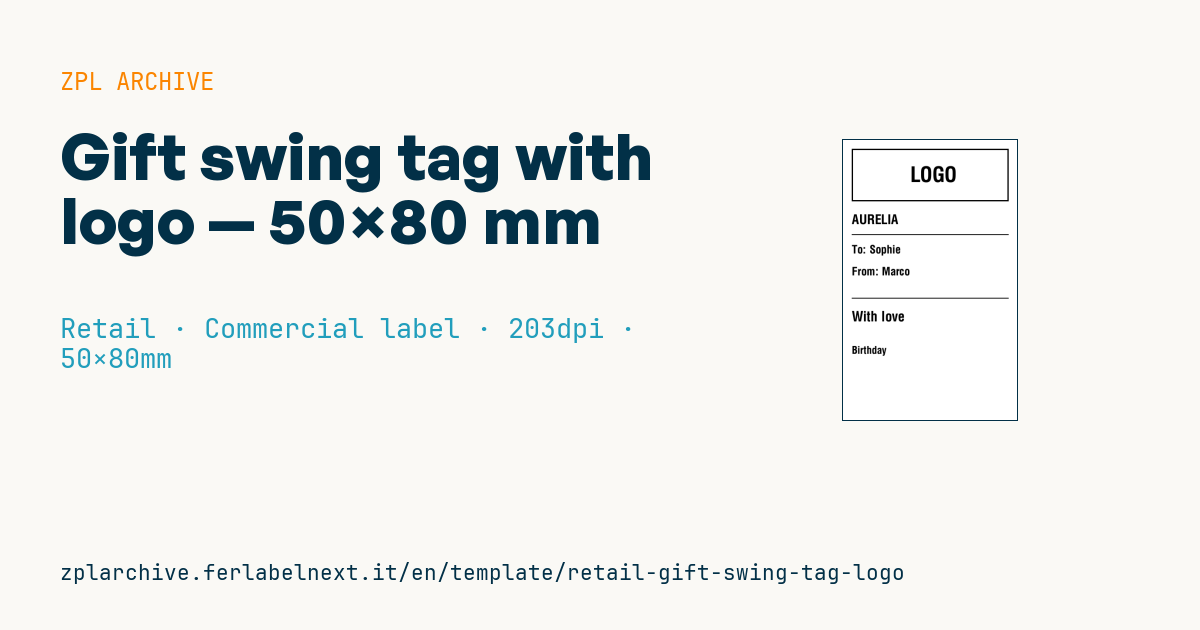
Gift swing tag with logo
50×80 mm @ 203 dpi. Vertical tag to hang on the gift package. At the top the logo area: a placeholder frame with "LOGO" text, to be replaced with the real brand logo (^GF image).
Placeholders
brandto_name— recipientfrom_name— sendermessage— short message (e.g.With love)occasion— occasion (e.g.Birthday)
The "LOGO" frame is a placeholder: replace it with your logo as a graphic (
^GF).
When to use it
Boutiques, perfume shops, bookshops and gift stores that offer gift wrapping use this tag: the cashier types recipient, sender and a short message, prints, and hangs the tag on the ribbon with a string. During peaks such as Christmas or Mother's Day it lets staff personalise dozens of parcels without handwriting.
The typical media is pre-punched tag stock with a hole, printed by thermal transfer with a wax or wax-resin ribbon. Direct thermal paper is fine only if the gift is handed over soon: with light and heat it tends to yellow.
Standards and requirements
There is no specific standard for a gift tag: the requirements are practical. Text must be readable at a glance, names must stay inside their box and the hole must not cover any text.
On the ZPL side, use ^CI28 to print names with accents or characters such as ñ and ß correctly, and ^FB to wrap the message across several centred lines. If the tag stock has notches or holes for the sensor, set media sensing with ^MNW (or ^MNM if the roll has a black mark) and calibrate the printer. On thick stock, lower the speed with ^PR and adjust darkness with ~SD for solid black.
Common mistakes
- Leaving fields without
^FB: a long name runs off the tag or ends up under the hole. - Printing without
^CI28and getting wrong characters instead of accented letters. - Using a full-resin ribbon on uncoated tag stock: it bonds poorly and flakes off.
- Skipping calibration after a roll change, so the print drifts onto the hole.
FAQ
What material should I use for a hanging gift tag?
Tag stock of 170-250 g/m² with a punched hole, printed by thermal transfer. Ask your supplier which ribbon it is compatible with.
How do I print long messages on several lines?
Use ^FB with width, maximum number of lines and alignment: the text wraps automatically.
ZPL code
^XA
^LL639
^CI28
^PW400
^FO20,20^GB360,120,3^FS
^CF0,48^FO140,60^FD LOGO ^FS
^CF0,30^FO20,170^FD{{brand}}^FS
^FO20,215^GB360,2,2^FS
^CF0,26^FO20,240^FDTo: {{to_name}}^FS
^FO20,290^FDFrom: {{from_name}}^FS
^FO20,360^GB360,2,2^FS
^CF0,32^FO20,390^FD{{message}}^FS
^CF0,24^FO20,470^FD{{occasion}}^FS
^XZ- Industry: Retail
- Category: Commercial label
- DPI: 203
- Size: 50×80 mm
- Tags: Gift, Gift tag, Logo
What this label contains
Barcodes
This label contains no barcodes: it is made of text and graphics.
Elements
- 6 text fields
- 5 variable fields to fill in
- boxes and separator lines
Variable fields
| Field | Description | Example |
|---|---|---|
brand | Brand | AURELIA |
to_name | To | Sophie |
from_name | From | Marco |
message | Message | With love |
occasion | Occasion | Birthday |
Format and printing
50×80 mm (1.97×3.15″) at 203 dpi: 400×639 dots. Portrait.
Compatible Zebra printers
You need a printer with a 2″ printhead at 203 dpi, for example:
- Zebra ZD411 (desktop)
- Zebra ZD611 (desktop)
- Zebra ZQ220 (mobile)
- Zebra ZQ310 (mobile)
Any Zebra printer with a wider printhead and the same resolution works too.
The code is written for 203 dpi: on a printer with a different resolution the label prints larger or smaller and needs rescaling.
How to use it
- Open “Customize placeholders” and enter your data in the variable fields listed above.
- Check the preview: it is rendered from the same ZPL code you will send to the printer.
- Download the .zpl file or copy the code and send it to the printer: with “Print” through Zebra Browser Print, or as a raw file to port 9100 if the printer is on the network.
- Load 50×80 mm labels and make sure the printer is set to 203 dpi. For a different size use “Duplicate & edit” and adapt the layout in the builder.
Edit it in the editor
To change the layout, use “Duplicate & edit”: the template opens in the online ZPL editor, where you modify it and save it to your account for free.
Related templates
- Black Friday with offer QR — 50×40 mm 300 dpi · Retail · Commercial label
- EAN13 + bilingual IT/EN description — 60×40 mm 203 dpi · Retail · Commercial label
- Handmade soap label with logo — 50×40 mm 203 dpi · Retail · Commercial label
- Basic EAN13 product — 50×30 mm 203 dpi · Retail · Commercial label
- Summer sale with EAN-13 — 60×40 mm 203 dpi · Retail · Commercial label
- Clearance window poster — 70×50 mm 203 dpi · Retail · Commercial label
- Price + product name — 70×40 mm 203 dpi · Retail · Commercial label
- -50% off sticker — 40×40 mm 203 dpi · Retail · Commercial label