WIP / job traveler — 100×60 mm
Work-in-progress traveler with a QR to the routing sheet, work order, product, current step, next operation and quantity. To track semi-finished goods.
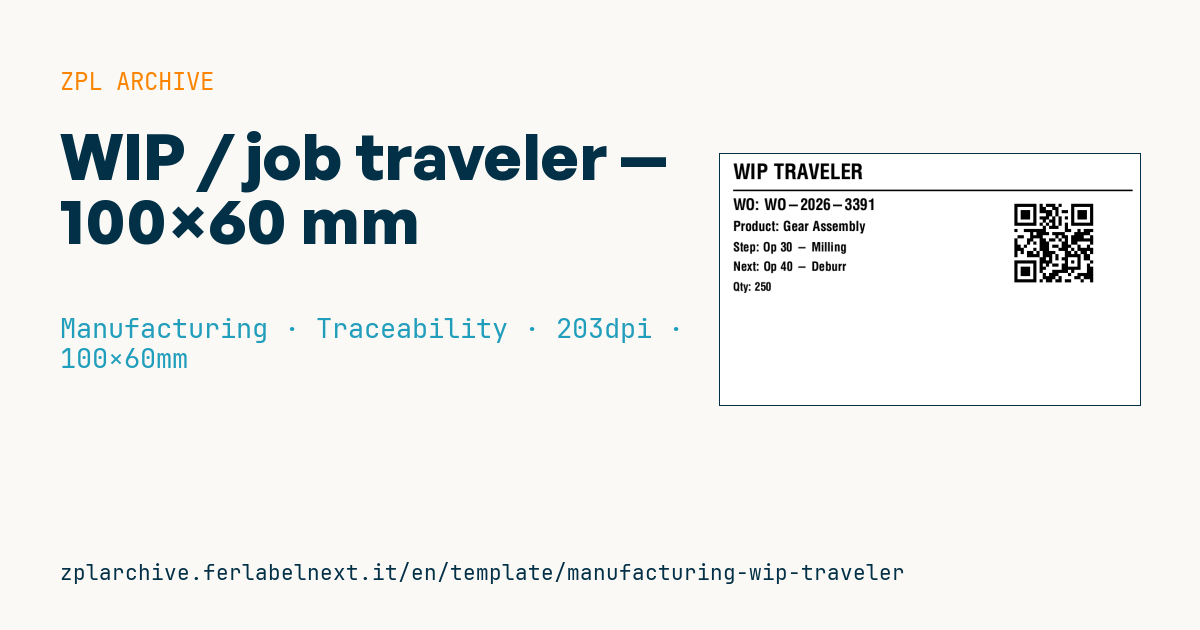
WIP / job traveler
100×60 mm @ 203 dpi. Title, separator, QR to the routing sheet, work order, product, current step, next operation and quantity.
Placeholders
title_label— title (e.g.WIP TRAVELER)traveler_url— routing sheet URLwo_number/product_name— order and productcurrent_step/next_op— current and next stepquantity— quantity
When to use it
The traveler is printed when a work order is released and moves with the semi-finished goods from one operation to the next: cutting, machining, treatment, assembly. The operator at each station sees at once which order the material belongs to and where it goes next; scanning the QR opens the current routing, drawings and progress reporting.
On the shop floor the traveler gets dirty and folded: put it in a clear pouch fixed to the container or print it on synthetic paper.
Standards and requirements
There is no standard for job traveler layout. For ERP-MES integration the reference is IEC 62264 (ISA-95), which describes data flows, not the label. The practical requirements are a unique link to the order, a QR code pointing to data that is always current, and a quantity that matches what is actually in the container.
The QR is produced with ^BQN,2, plus the magnification; at 203 dpi a factor of 4 gives 0.5 mm modules, readable even through a plastic pouch. Keep the URL short, ideally with just the order ID as a parameter.
Common mistakes
- Trusting the printed current step: it is outdated after the first move, so reprint the traveler or treat the QR as the reference.
- Linking the QR to a static PDF of the routing that ignores engineering changes.
- Splitting a batch without printing a traveler for each part with the right quantity.
FAQ
What is the difference between a job traveler and a work order label?
The work order label identifies the order; the traveler physically accompanies the material and shows current and next operation. They often coexist: one on the order folder, the other on the container.
What should you do when a batch is split between two machines?
Print a traveler for each part with its own quantity and the same order, and record the split in the MES.
ZPL code
^XA
^PW799
^LL480
^CI28
^CF0,40^FO25,18^FD{{title_label}}^FS
^FO25,68^GB760,3,3^FS
^FO560,85^BQN,2,6^FDLA,{{traveler_url}}^FS
^CF0,30^FO25,85^FDWO: {{wo_number}}^FS
^CF0,26^FO25,128^FDProduct: {{product_name}}^FS
^CF0,24^FO25,168^FDStep: {{current_step}}^FS
^CF0,24^FO25,205^FDNext: {{next_op}}^FS
^CF0,22^FO25,245^FDQty: {{quantity}}^FS
^XZ- Industry: Manufacturing
- Category: Traceability
- DPI: 203
- Size: 100×60 mm
- Tags: Manufacturing, Production, QR Code, Work in progress
What this label contains
Barcodes
- QR Code
- 2D code for links, text and structured data, readable by any smartphone.
Elements
- 6 text fields
- 7 variable fields to fill in
- boxes and separator lines
Variable fields
| Field | Description | Example |
|---|---|---|
title_label | Title | WIP TRAVELER |
traveler_url | Traveler URL | https://mes.example/wo/3391 |
wo_number | WO | WO-2026-3391 |
product_name | Product | Gear Assembly |
current_step | Step | Op 30 - Milling |
next_op | Next | Op 40 - Deburr |
quantity | Quantity | 250 |
Format and printing
100×60 mm (3.94×2.36″) at 203 dpi: 799×480 dots. Landscape.
Compatible Zebra printers
You need a printer with a 4″ printhead at 203 dpi, for example:
- Zebra ZD421 (desktop)
- Zebra ZD621 (desktop)
- Zebra GK420 (desktop)
- Zebra ZT231 (industrial)
- Zebra ZT411 (industrial)
- Zebra ZT610 (industrial)
- Zebra ZQ521 (mobile)
- Zebra ZQ630 (mobile)
Any Zebra printer with a wider printhead and the same resolution works too.
The code is written for 203 dpi: on a printer with a different resolution the label prints larger or smaller and needs rescaling.
How to use it
- Open “Customize placeholders” and enter your data in the variable fields listed above.
- Check the preview: it is rendered from the same ZPL code you will send to the printer.
- Download the .zpl file or copy the code and send it to the printer: with “Print” through Zebra Browser Print, or as a raw file to port 9100 if the printer is on the network.
- Load 100×60 mm labels and make sure the printer is set to 203 dpi. For a different size use “Duplicate & edit” and adapt the layout in the builder.
Edit it in the editor
To change the layout, use “Duplicate & edit”: the template opens in the online ZPL editor, where you modify it and save it to your account for free.
Related templates
- Company asset tag with QR — 50×50 mm 203 dpi · Manufacturing · Asset
- Generic GS1-128 — 100×50 mm 203 dpi · Manufacturing · GS1-128
- Document control label — 60×40 mm 203 dpi · Manufacturing · Documents
- Kanban card — 100×70 mm 203 dpi · Manufacturing · Commercial label
- Fixed asset with QR — 50×30 mm 203 dpi · Manufacturing · Asset
- Preventive maintenance — 60×40 mm 203 dpi · Manufacturing · Asset
- Daily visitor pass — 100×70 mm 203 dpi · Manufacturing · Badge
- Machine asset DataMatrix — 40×25 mm 300 dpi · Manufacturing · Asset