Work order — 70×50 mm
Work order label for production: WO number, part number, quantity, due date and a Code 128 barcode. To launch and track a batch.
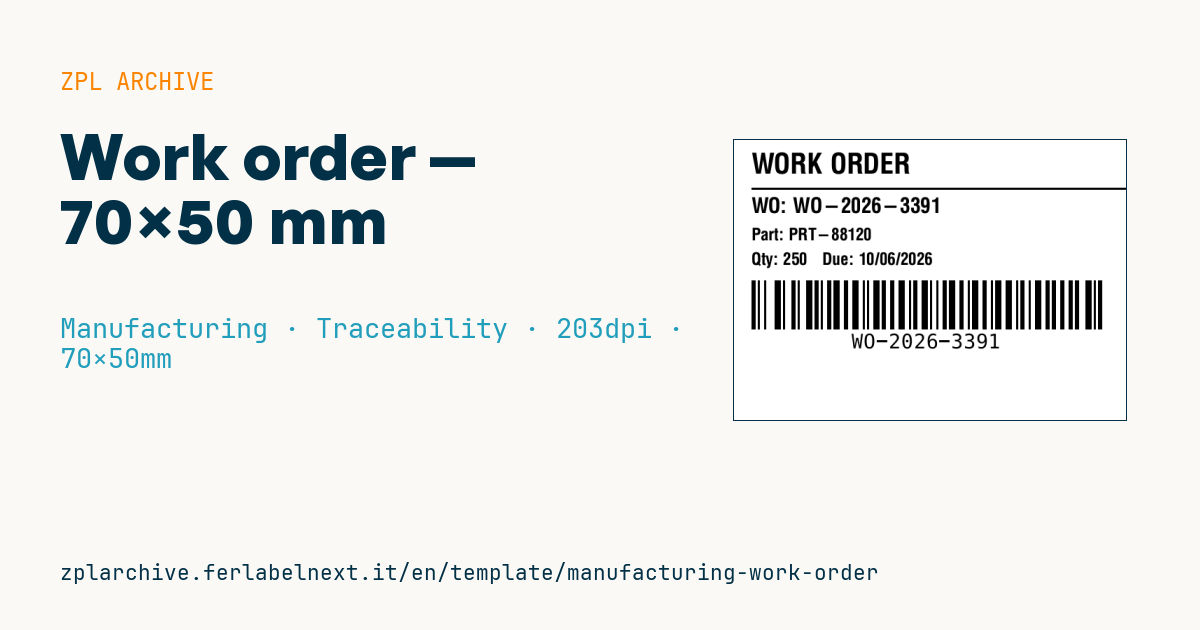
Work order
70×50 mm @ 203 dpi. Title, separator, WO number, part, quantity+due date and a Code 128 barcode with the WO number.
Placeholders
title_label— title (e.g.WORK ORDER)wo_number— work order numberpart_number— part numberquantity/due_date— quantity and due date
When to use it
It is printed when planning releases a work order and applied to the order folder, the component kit picked from stores or the first container of the batch. Operators scan the Code 128 at their stations to report start and finish, times and quantities produced without typing the order number.
It is a short-lived label tied to the life of the order, so direct thermal paper is fine. If the order stays open for weeks or the kit passes through hot areas, use thermal transfer.
Standards and requirements
There is no standard for work order labels: the content depends on your ERP or MES. For the due date, ISO 8601 YYYY-MM-DD is the safe choice because it cannot be misread across countries. Code 128 always includes a modulo 103 check character calculated by the printer, so you do not need to add your own.
For purely numeric order numbers, the automatic mode of ^BC (last parameter A) picks the most compact subset. At 203 dpi ^BY2 gives a 0.25 mm module: on 70 mm there is room for a 10-12 digit code with quiet zones.
Common mistakes
- Printing a prefix in the barcode (such as
WO-) that the MES does not expect, or configuring the scanner with prefixes and suffixes that alter the input. - Reprinting after rescheduling without removing the old label with outdated quantity or date.
- Shrinking the barcode height to make room for text: below 10 mm, handheld scanning gets worse.
FAQ
Should a work order number have a check digit?
Not for scanning: Code 128 already has a built-in check. A check digit in the number itself only helps if operators often key it in by hand.
Code 128 or Code 39 for work orders?
Code 128 is more compact and encodes the full ASCII set; Code 39 only makes sense if an existing system requires it.
ZPL code
^XA
^PW559
^LL400
^CI28
^CF0,40^FO25,18^FD{{title_label}}^FS
^FO25,68^GB540,3,3^FS
^CF0,30^FO25,82^FDWO: {{wo_number}}^FS
^CF0,24^FO25,125^FDPart: {{part_number}}^FS
^CF0,24^FO25,160^FDQty: {{quantity}}   Due: {{due_date}}^FS
^BY3,2,70
^FO25,200^BCN,70,Y,N,N^FD{{wo_number}}^FS
^XZ- Industry: Manufacturing
- Category: Traceability
- DPI: 203
- Size: 70×50 mm
- Tags: Code 128, Manufacturing, Production, Work order
What this label contains
Barcodes
- Code 128
- High-density linear barcode that encodes the full ASCII set: ideal for tracking numbers, internal codes and alphanumeric IDs.
Elements
- 4 text fields
- 5 variable fields to fill in
- boxes and separator lines
Variable fields
| Field | Description | Example |
|---|---|---|
title_label | Title | WORK ORDER |
wo_number | WO number | WO-2026-3391 |
part_number | Part | PRT-88120 |
quantity | Quantity | 250 |
due_date | Due | 10/06/2026 |
Format and printing
70×50 mm (2.76×1.97″) at 203 dpi: 559×400 dots. Landscape.
Compatible Zebra printers
You need a printer with a 4″ printhead at 203 dpi, for example:
- Zebra ZD421 (desktop)
- Zebra ZD621 (desktop)
- Zebra GK420 (desktop)
- Zebra ZT231 (industrial)
- Zebra ZT411 (industrial)
- Zebra ZT610 (industrial)
- Zebra ZQ521 (mobile)
- Zebra ZQ630 (mobile)
Any Zebra printer with a wider printhead and the same resolution works too.
The code is written for 203 dpi: on a printer with a different resolution the label prints larger or smaller and needs rescaling.
How to use it
- Open “Customize placeholders” and enter your data in the variable fields listed above.
- Check the preview: it is rendered from the same ZPL code you will send to the printer.
- Download the .zpl file or copy the code and send it to the printer: with “Print” through Zebra Browser Print, or as a raw file to port 9100 if the printer is on the network.
- Load 70×50 mm labels and make sure the printer is set to 203 dpi. For a different size use “Duplicate & edit” and adapt the layout in the builder.
Edit it in the editor
To change the layout, use “Duplicate & edit”: the template opens in the online ZPL editor, where you modify it and save it to your account for free.
Related templates
- Company asset tag with QR — 50×50 mm 203 dpi · Manufacturing · Asset
- Generic GS1-128 — 100×50 mm 203 dpi · Manufacturing · GS1-128
- Document control label — 60×40 mm 203 dpi · Manufacturing · Documents
- Kanban card — 100×70 mm 203 dpi · Manufacturing · Commercial label
- Fixed asset with QR — 50×30 mm 203 dpi · Manufacturing · Asset
- Preventive maintenance — 60×40 mm 203 dpi · Manufacturing · Asset
- Daily visitor pass — 100×70 mm 203 dpi · Manufacturing · Badge
- Machine asset DataMatrix — 40×25 mm 300 dpi · Manufacturing · Asset