Picking list slip — 80×60 mm
Operational slip for picking tasks: order, operator, wave, counts and order barcode.
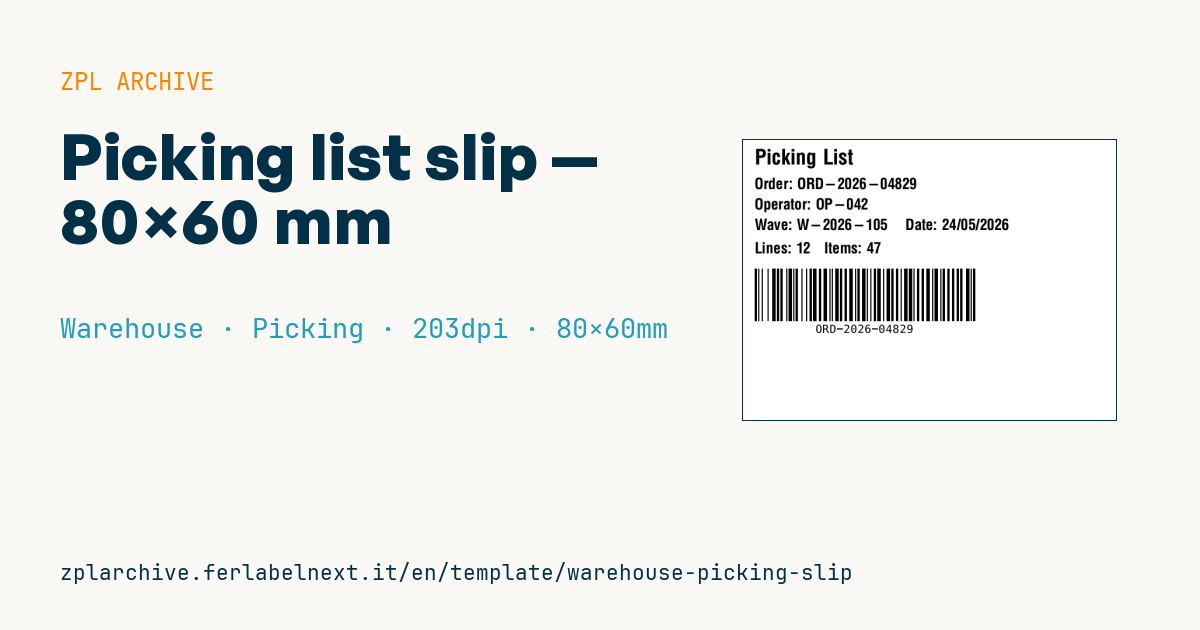
Picking list slip
80×60 mm format. Printed by the WMS at the top of the picking list; the operator attaches it to the carton to track the task.
Placeholders
order_id— order to pickoperator— operator codewave_id— wave id (order group)pick_date—dd/mm/yyyyline_count,item_count— totals
When to use it
The slip is printed when a picking task starts, at the top of the pick list or directly on the trolley. The operator drops it into the carton or tote and, at the end of the run, the packing station scans the order barcode to recall the list and check lines and units. It is handy in wave picking, where several orders are released together and you need to see at a glance which wave each container belongs to.
The slip lives for a few hours and is not shipped, so plain direct thermal paper, even non-adhesive, is the cheapest choice. With mobile printers on the trolley, a continuous roll works best.
Standards and requirements
There is no standard for picking slips: it is an internal operational document. The practical requirements are an order Code 128 that scans first time at packing, line and unit totals that match the WMS, and an unambiguous date. If the order ID is numeric with an even number of digits, Code 128 subset C (>; in ZPL) gives a shorter barcode. On thermal paper set darkness with ~SD or ^MD without overdoing it: too much heat widens the bars.
Common mistakes
- Printing unit counts before the WMS has confirmed allocated lines, so totals don't add up.
- Using one slip for several containers of the same order without marking "1 of N".
- Printing the wave ID too small when sorting is done by wave.
- Leaving the slip in the parcel shipped to the customer, with internal data such as the operator code.
FAQ
Does the slip need to be adhesive?
Not necessarily: if it goes inside the tote, non-adhesive thermal paper is enough. If it is stuck on the carton, use a thermal label with removable adhesive.
Why does the order barcode scan poorly?
Often darkness is too high or the printhead is dirty. Check ~SD, clean the head and verify the quiet zone.
ZPL code
^XA
^PW639
^LL480
^CI28
^CF0,36^FO20,15^FDPicking List^FS
^CF0,26
^FO20,65^FDOrder: {{order_id}}^FS
^FO20,100^FDOperator: {{operator}}^FS
^FO20,135^FDWave: {{wave_id}}    Date: {{pick_date}}^FS
^FO20,175^FDLines: {{line_count}}   Items: {{item_count}}^FS
^BY2,2,90
^FO20,220^BCN,90,Y,N,N^FD{{order_id}}^FS
^XZWhat this label contains
Barcodes
- Code 128
- High-density linear barcode that encodes the full ASCII set: ideal for tracking numbers, internal codes and alphanumeric IDs.
Elements
- 5 text fields
- 6 variable fields to fill in
Variable fields
| Field | Description | Example |
|---|---|---|
order_id | Order | ORD-2026-04829 |
operator | Operator | OP-042 |
wave_id | Wave | W-2026-105 |
pick_date | Date | 24/05/2026 |
line_count | Lines | 12 |
item_count | Items | 47 |
Format and printing
80×60 mm (3.15×2.36″) at 203 dpi: 639×480 dots. Landscape.
Compatible Zebra printers
You need a printer with a 4″ printhead at 203 dpi, for example:
- Zebra ZD421 (desktop)
- Zebra ZD621 (desktop)
- Zebra GK420 (desktop)
- Zebra ZT231 (industrial)
- Zebra ZT411 (industrial)
- Zebra ZT610 (industrial)
- Zebra ZQ521 (mobile)
- Zebra ZQ630 (mobile)
Any Zebra printer with a wider printhead and the same resolution works too.
The code is written for 203 dpi: on a printer with a different resolution the label prints larger or smaller and needs rescaling.
How to use it
- Open “Customize placeholders” and enter your data in the variable fields listed above.
- Check the preview: it is rendered from the same ZPL code you will send to the printer.
- Download the .zpl file or copy the code and send it to the printer: with “Print” through Zebra Browser Print, or as a raw file to port 9100 if the printer is on the network.
- Load 80×60 mm labels and make sure the printer is set to 203 dpi. For a different size use “Duplicate & edit” and adapt the layout in the builder.
Edit it in the editor
To change the layout, use “Duplicate & edit”: the template opens in the online ZPL editor, where you modify it and save it to your account for free.
Related templates
- Multi-level bay location — 100×50 mm 203 dpi · Warehouse · Location
- Single rack location — 50×30 mm 203 dpi · Warehouse · Location
- Shelf-edge / bin label — 40×20 mm 300 dpi · Warehouse · Location
- GS1 SSCC pallet — 100×150 mm 203 dpi · Warehouse · SSCC
- Pick face label with QR — 60×40 mm 203 dpi · Warehouse · Picking
- Cross-dock receiving — 100×70 mm 203 dpi · Warehouse · Cross-docking
- Zone / aisle sign — 100×50 mm 203 dpi · Warehouse · Location
- Quality hold label — 70×50 mm 203 dpi · Warehouse · Inventory